
I Built a Custom Keyboard
and it wasn’t that hard.
I’ve written before about building keyboards. One of the first questions I got after building my ErgoDox was from the another engineer I worked with.
Why didn’t you just trace an outline of your hand and build a keyboard to match it?
At first I thought that question was absurd. Me? Build a whole keyboard from scratch? I didn’t even know how to begin. That was three and a half years ago and my obsession with knowledge of keyboards has only grown since then. About two years ago I encountered the Planck keyboard and I was intrigued. The idea of having everything I needed that close to the home row? Awesome.
So I ordered a pcb and built one. I hated it. It wasn’t that keyboard was low quality, it wasn’t. In fact I’m very impressed at the craftsmanship of it. I ordered the pcb from olkb and it was amazing actually. Super easy to put together. I built my own plate and case and it worked easily. Not to mention, the QMK firmware is pretty fantastic. In fact I’ve since ported my ErgoDox layout to QMK instead because it’s got support for so many cool things.
Coming from the ErgoDox the first thing that drove me crazy was that it wasn’t split. At first I thought, “You’ll get over that!” and “It’s so portable, you can handle not split for the sake of portability!”. I was wrong. The second thing I had trouble with was my thumbs running into each other on the bottom row. The ErgoDox has trained me to stick them out so far.
I did learn a lot about how I wanted my keyboard to be from that one though. For one, the 40% design is great. In fact, I took that layout and put it straight onto my ErgoDox, melded with my own ErgoDox layout. I quickly stopped using the top row of my keyboard. I still came back to the question that engineer asked me before though:
Why didn’t you just trace an outline of your hand and build a keyboard to match it?
So I started looking for something in between. I stumbled on the lets split. For a moment I thought maybe that would be the right thing but then I went back to that question and thought to myself, “Well, someone else already laid out this circuit and written firmware, how hard could it be to hand wire one in the layout I want?”
Enter, the MittensKB. It has the same number of keys as the let’s split, and it uses the same firmware and micro controllers, but instead of being 100% ortholinear, I gave it vertically staggered columns and arcing thumb buttons.
So finally I’m back to the shape of my hands. Thumb buttons that aren’t too far away like the ErgoDox ones. Staggered in columns like your fingers are also staggered on your hand. I didn’t quite sit down and trace the shape of my hands, but I did print off this keyboard several times and iterate on the design until I felt like my fingers fit on it correctly.
To simplify things I thought I’d start off with something that already had firmware for it to make things easier, but I think the next one I build might be 100% custom because it’s actually not that hard adapt QMK for your own keyboards.
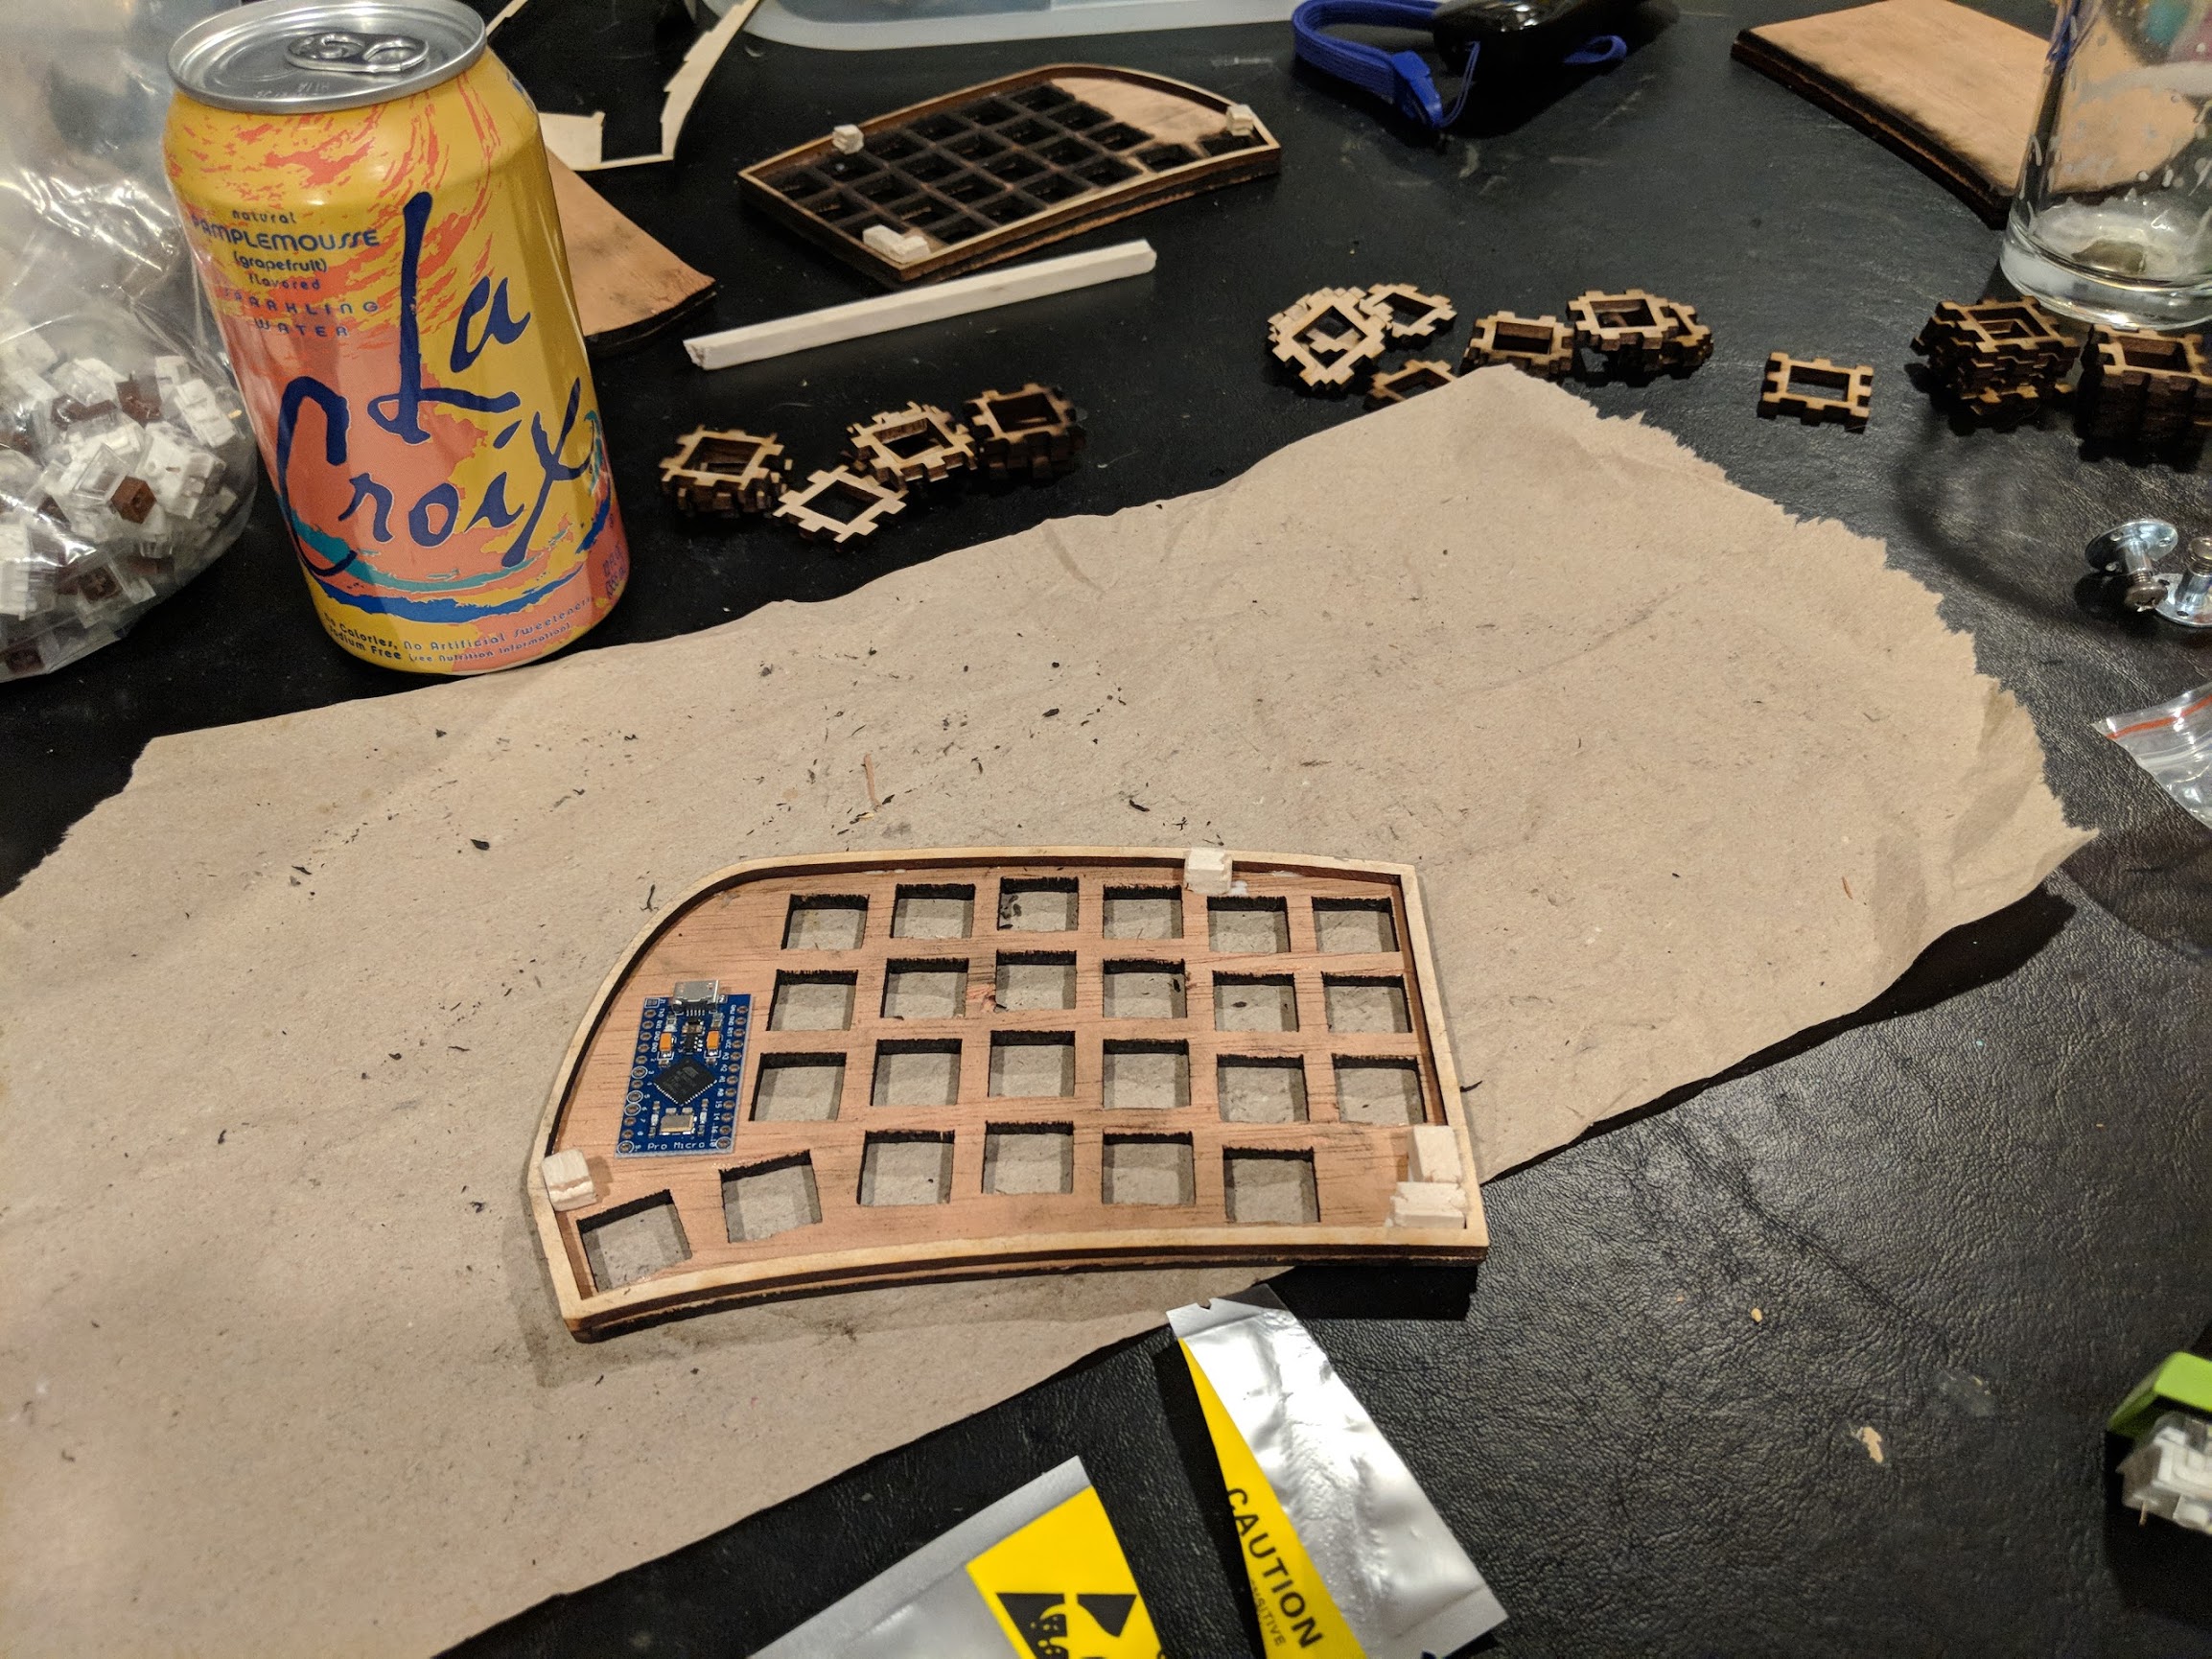
So for building the Mittens, after I had the basic design down, and I was sure I knew how it would fit on my hands, and the wrist rest (where I was going to put the micro-controller), the first step was to cut out the top and bottom plates.
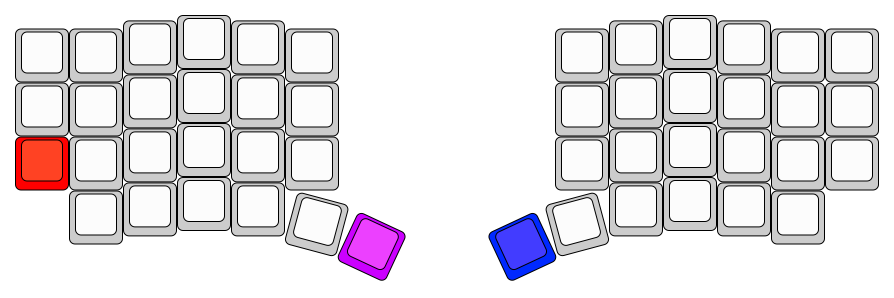
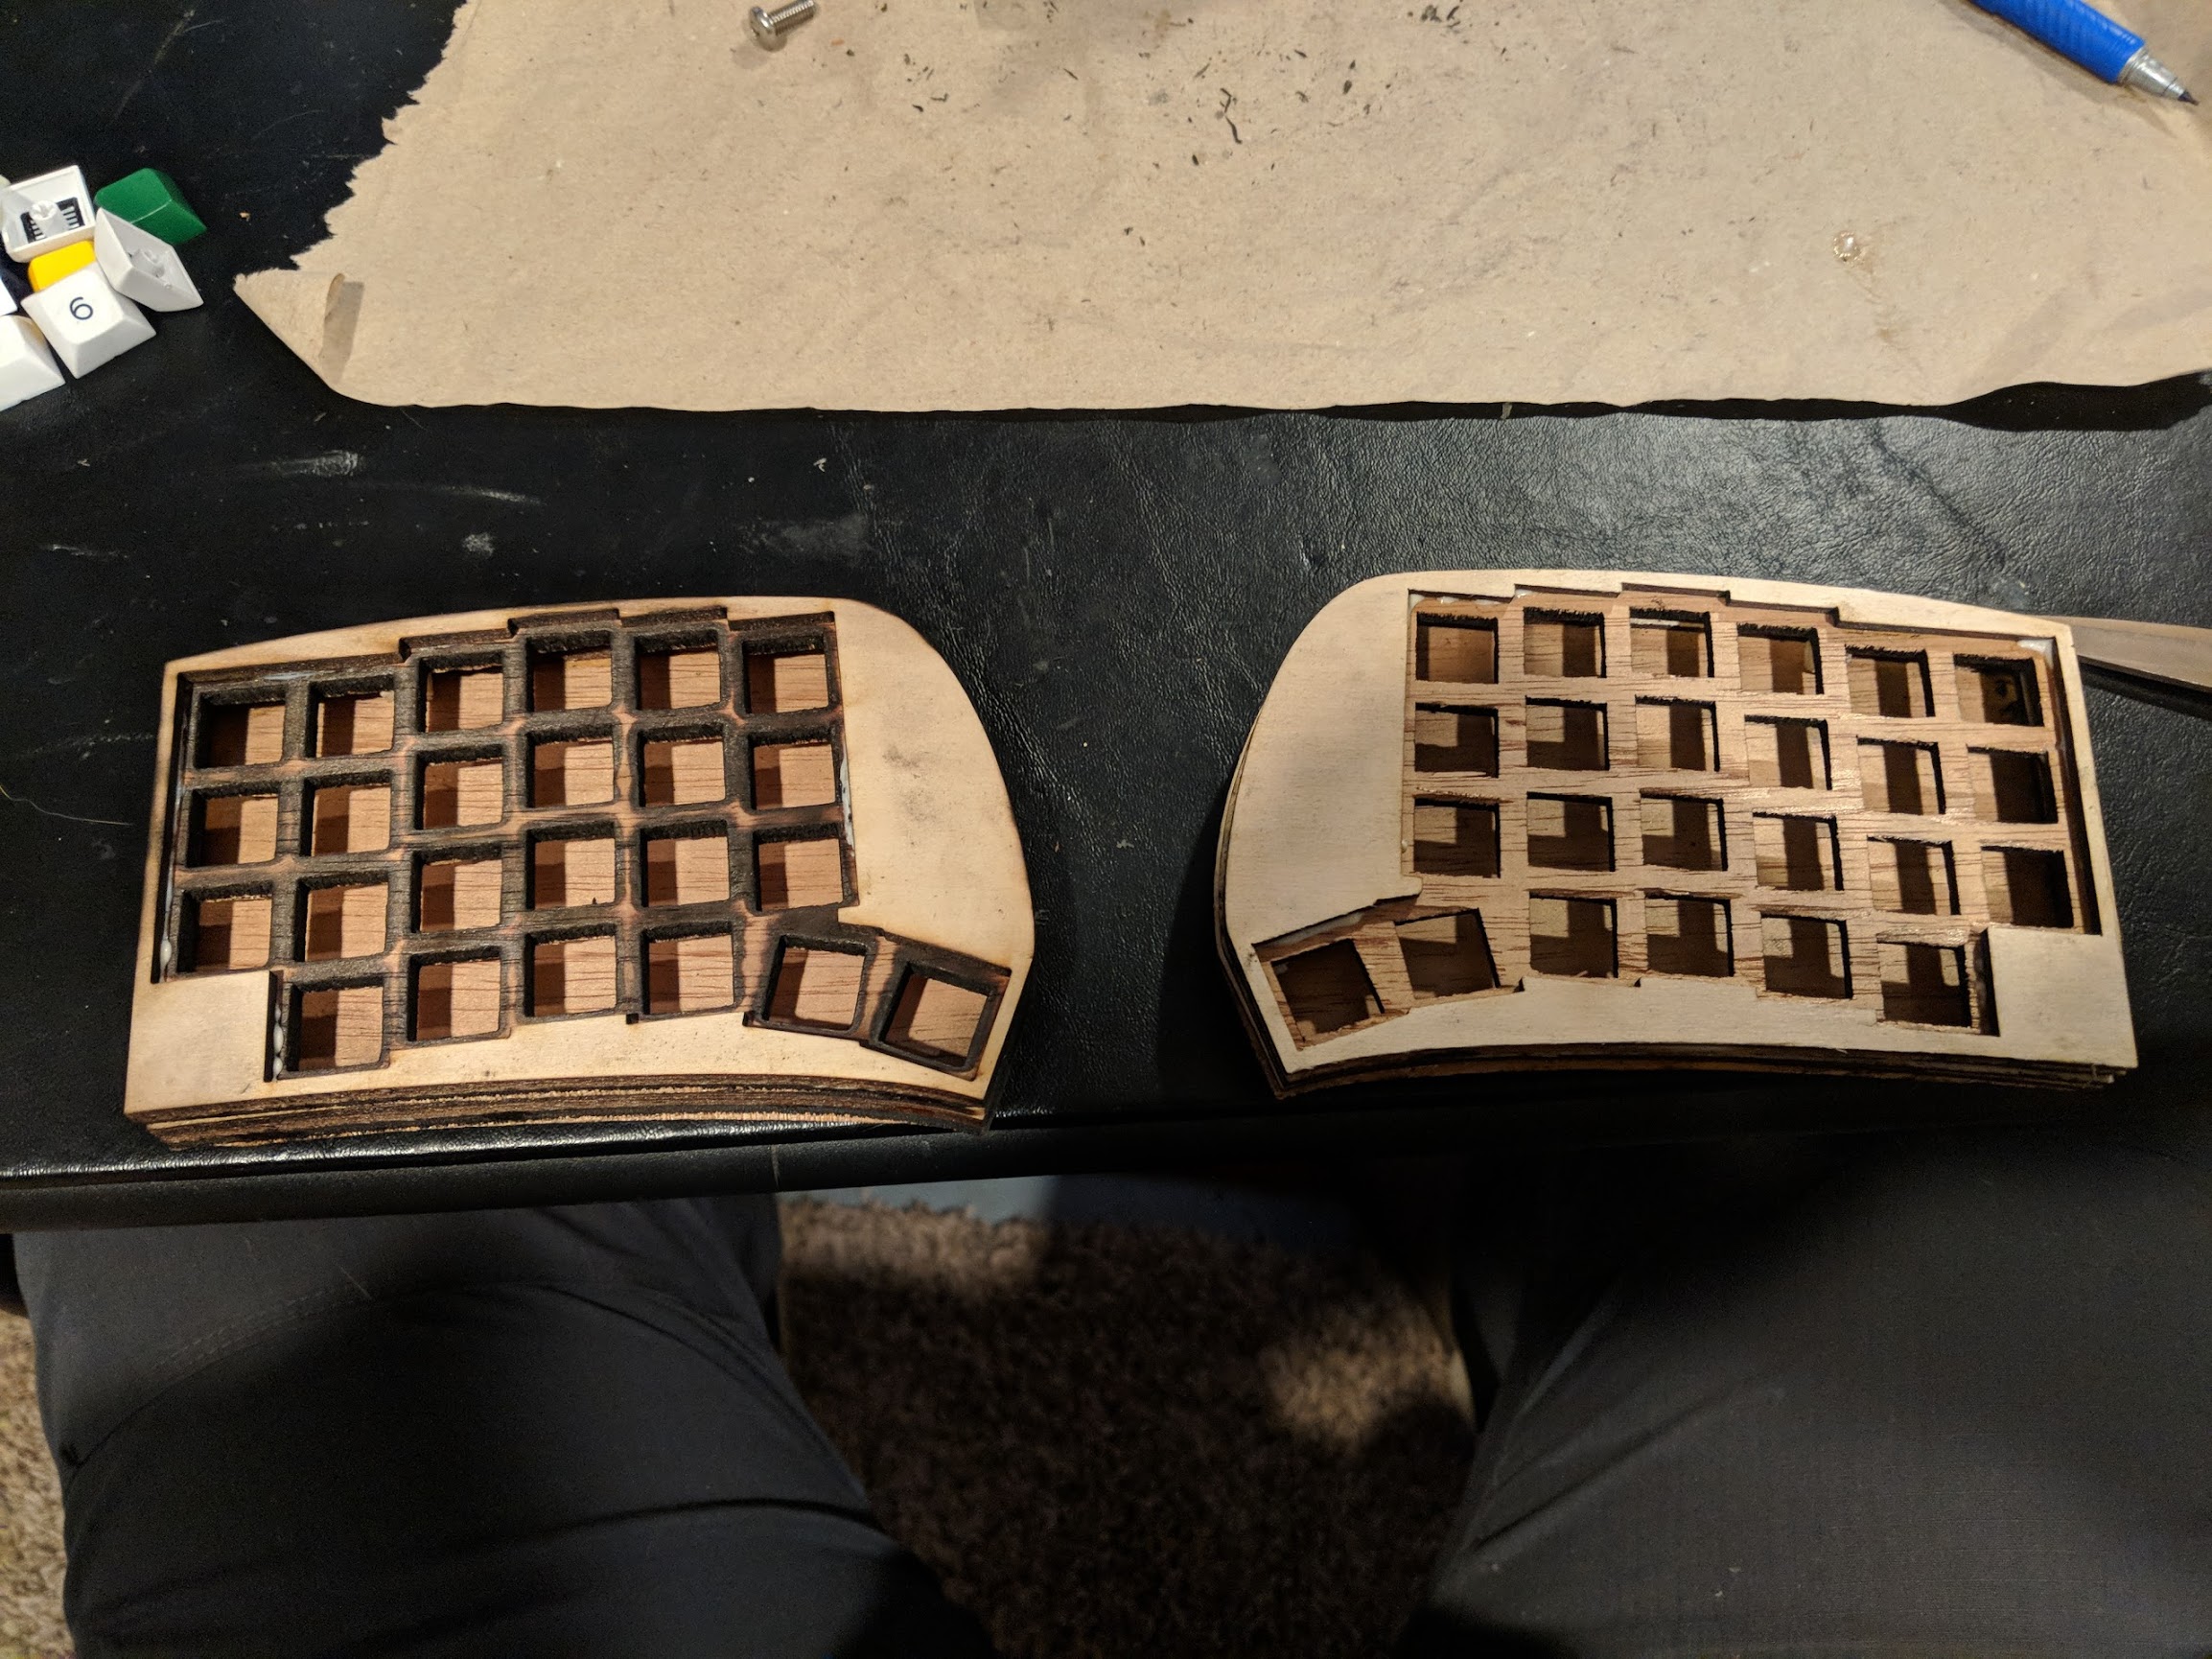
As usual, I screwed this up because I thought, hey, I’ll just cut this thing out and be done! Unfortunately the laser cutter I was using at TCMaker likes everything in svg form to be in exactly the dpi it expects. So end story, the thing I cut out the first time was 30% smaller than I needed it to be. Actually more like 33.333% smaller than I needed it to be. So I thought, “Hey, I’ll just scale it up by 30%!” Turns out that was just not quite enough because when I got home and put in all of the switches: A) The Kailh speed switches actually didn’t fit in the holes, and B) The other switches that did sort of fit were so close together the keycaps would get stuck down.
If you look at that picture you’ll see how close it got.
Anyway, so I mothballed the whole thing writing it off as a failure and sobbing myself to sleep at night. Okay that’s an overstatement. I did let my TCMaker membership expire without renewing it because paying $55/month for something you don’t go to is expensive.
Two weeks ago things changed. I wanted to work from home, but I couldn’t work at any of our desks because my muscle memory is such that the feedback of mechanical keys makes me want to type in a way that doesn’t work on normal keyboards. Plus I had learned about something new. Turns out the George Latimer Central Library in St Paul has what they call the Innovation Lab, a free makerspace for adults. And they have a laser cutter. And it’s free. And it’s 2 blocks from where I work. I literally have to walk past it on my way to work sometimes.
So I went and took their “Orientation”, which is really just code for sign some papers, talk about what neat stuff they have, and show you around and tell you about things you can do on all of the machines. I’ll say, that place is pretty neat. They’ve got a laser, a couple 3d printers, a vinyl plotter, and some other random equipment like sewing machines and laptops. Oh, also a recording studio.
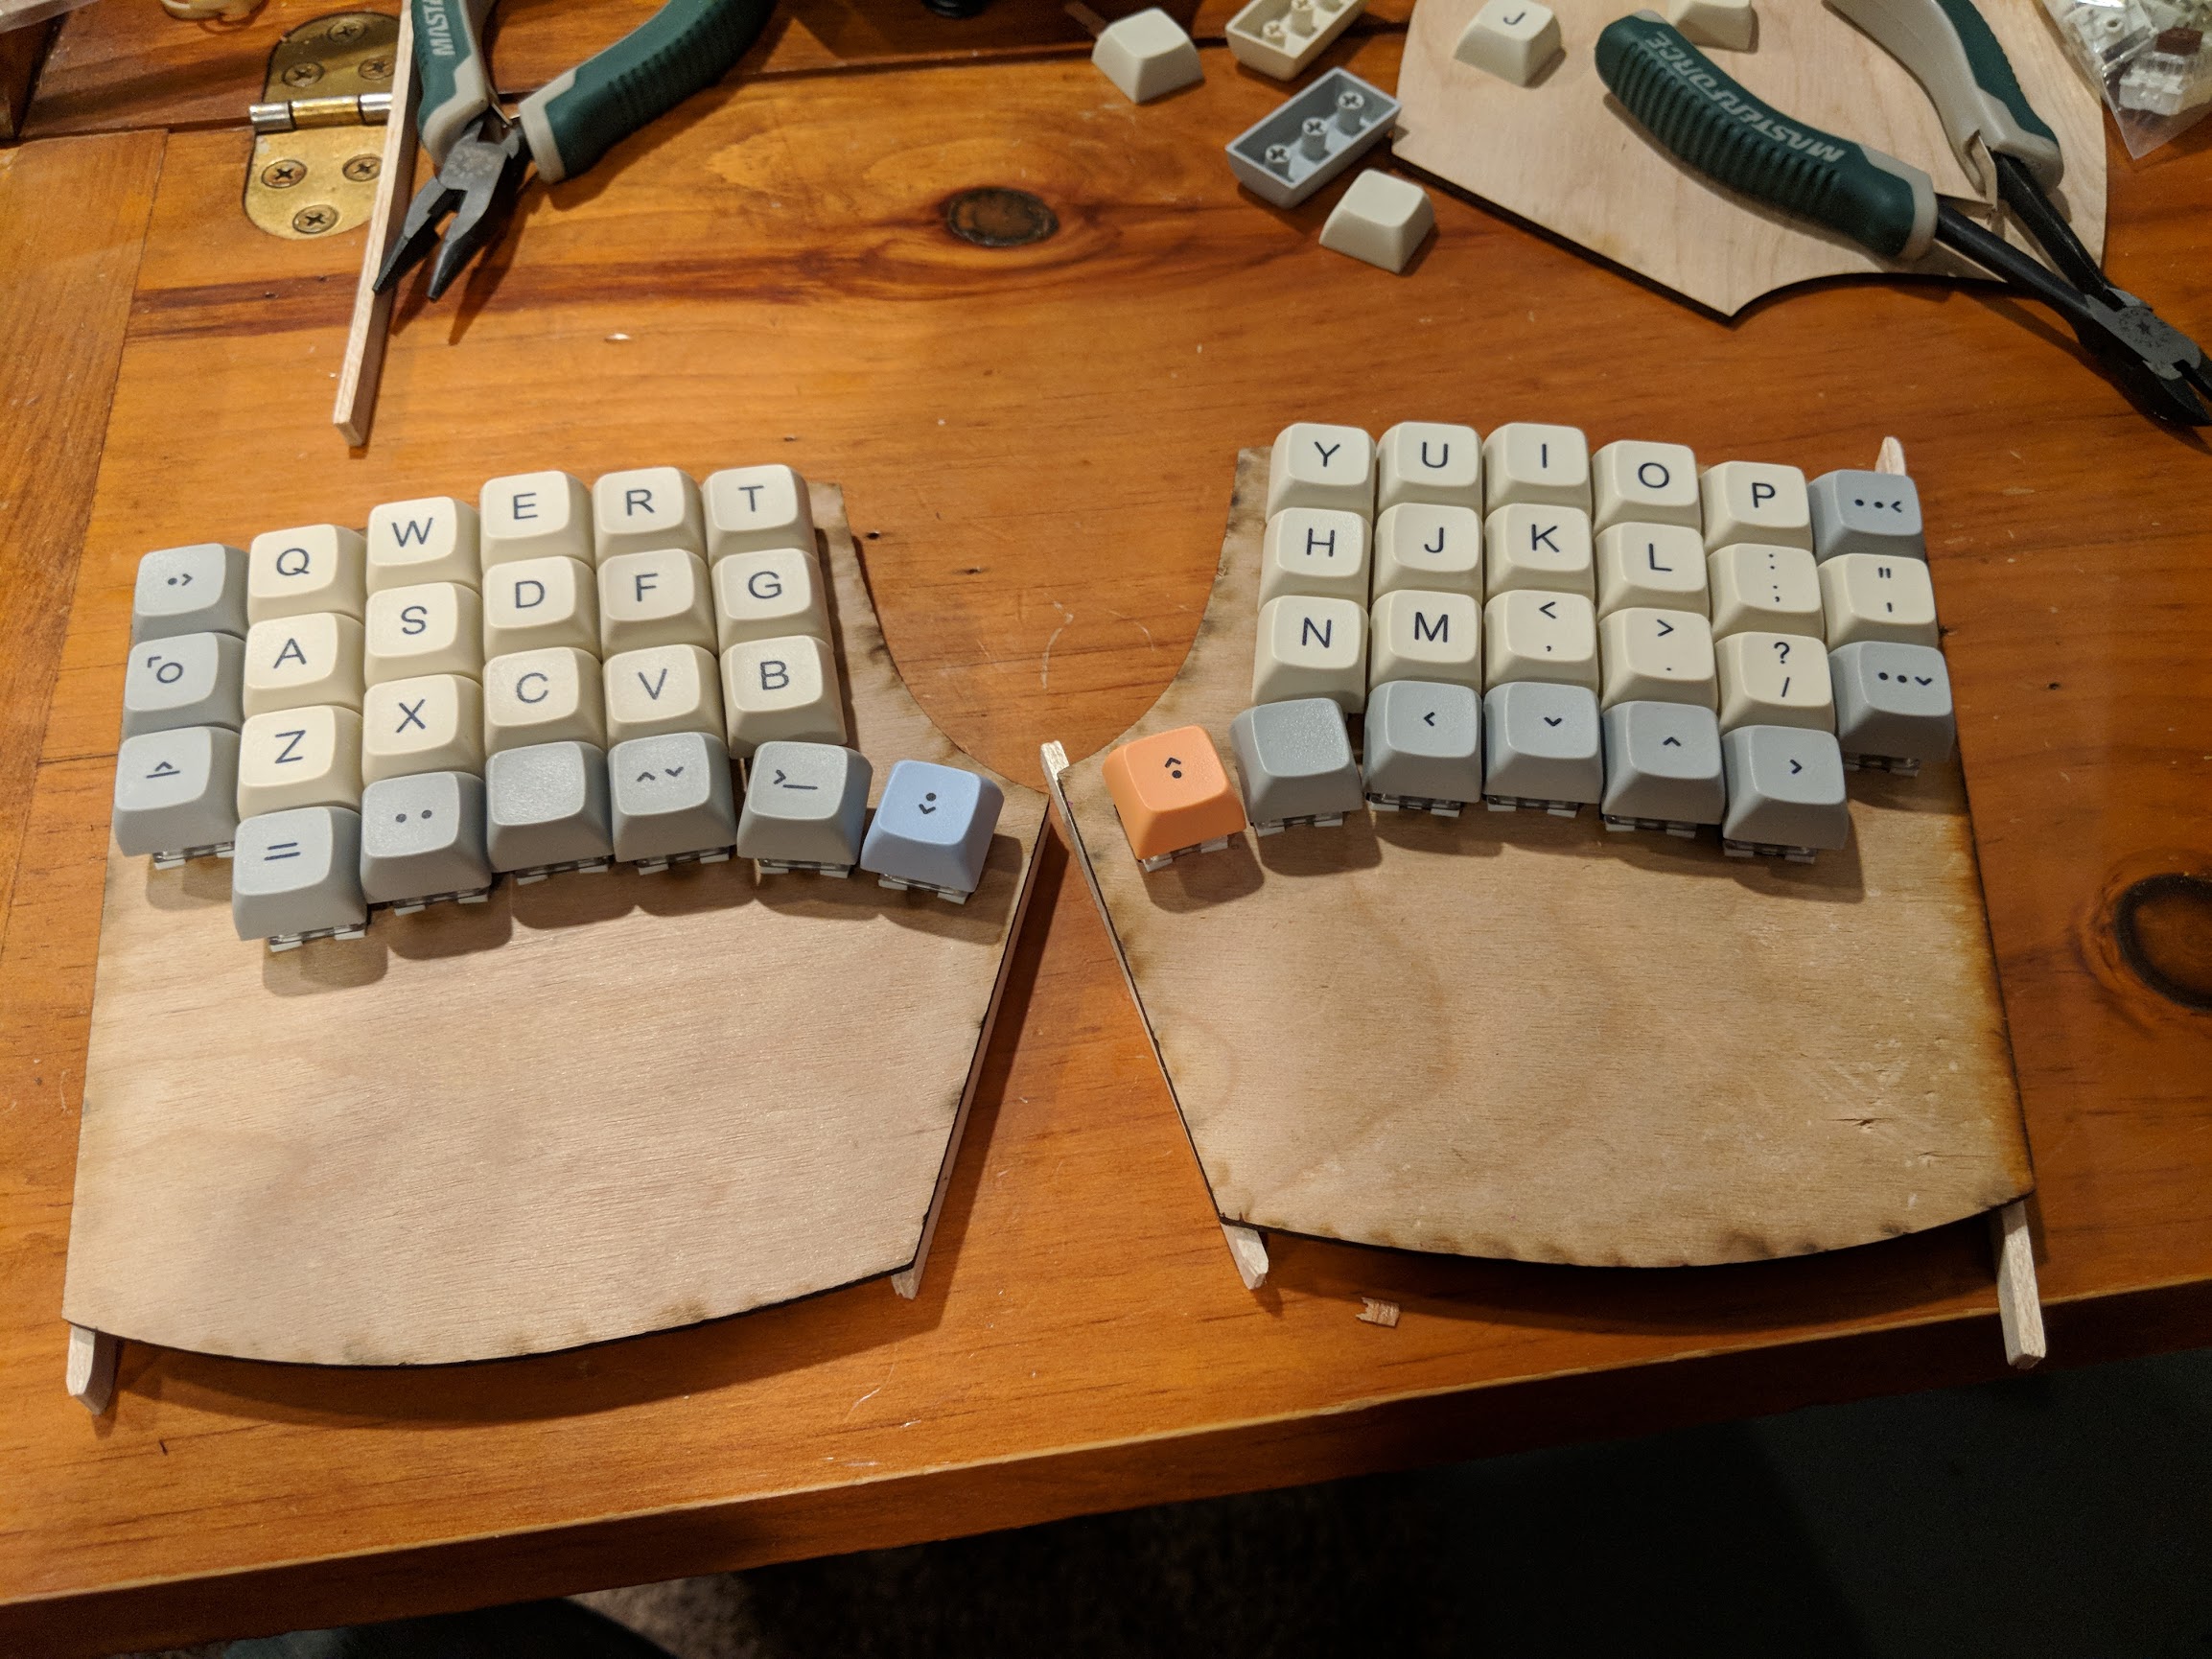
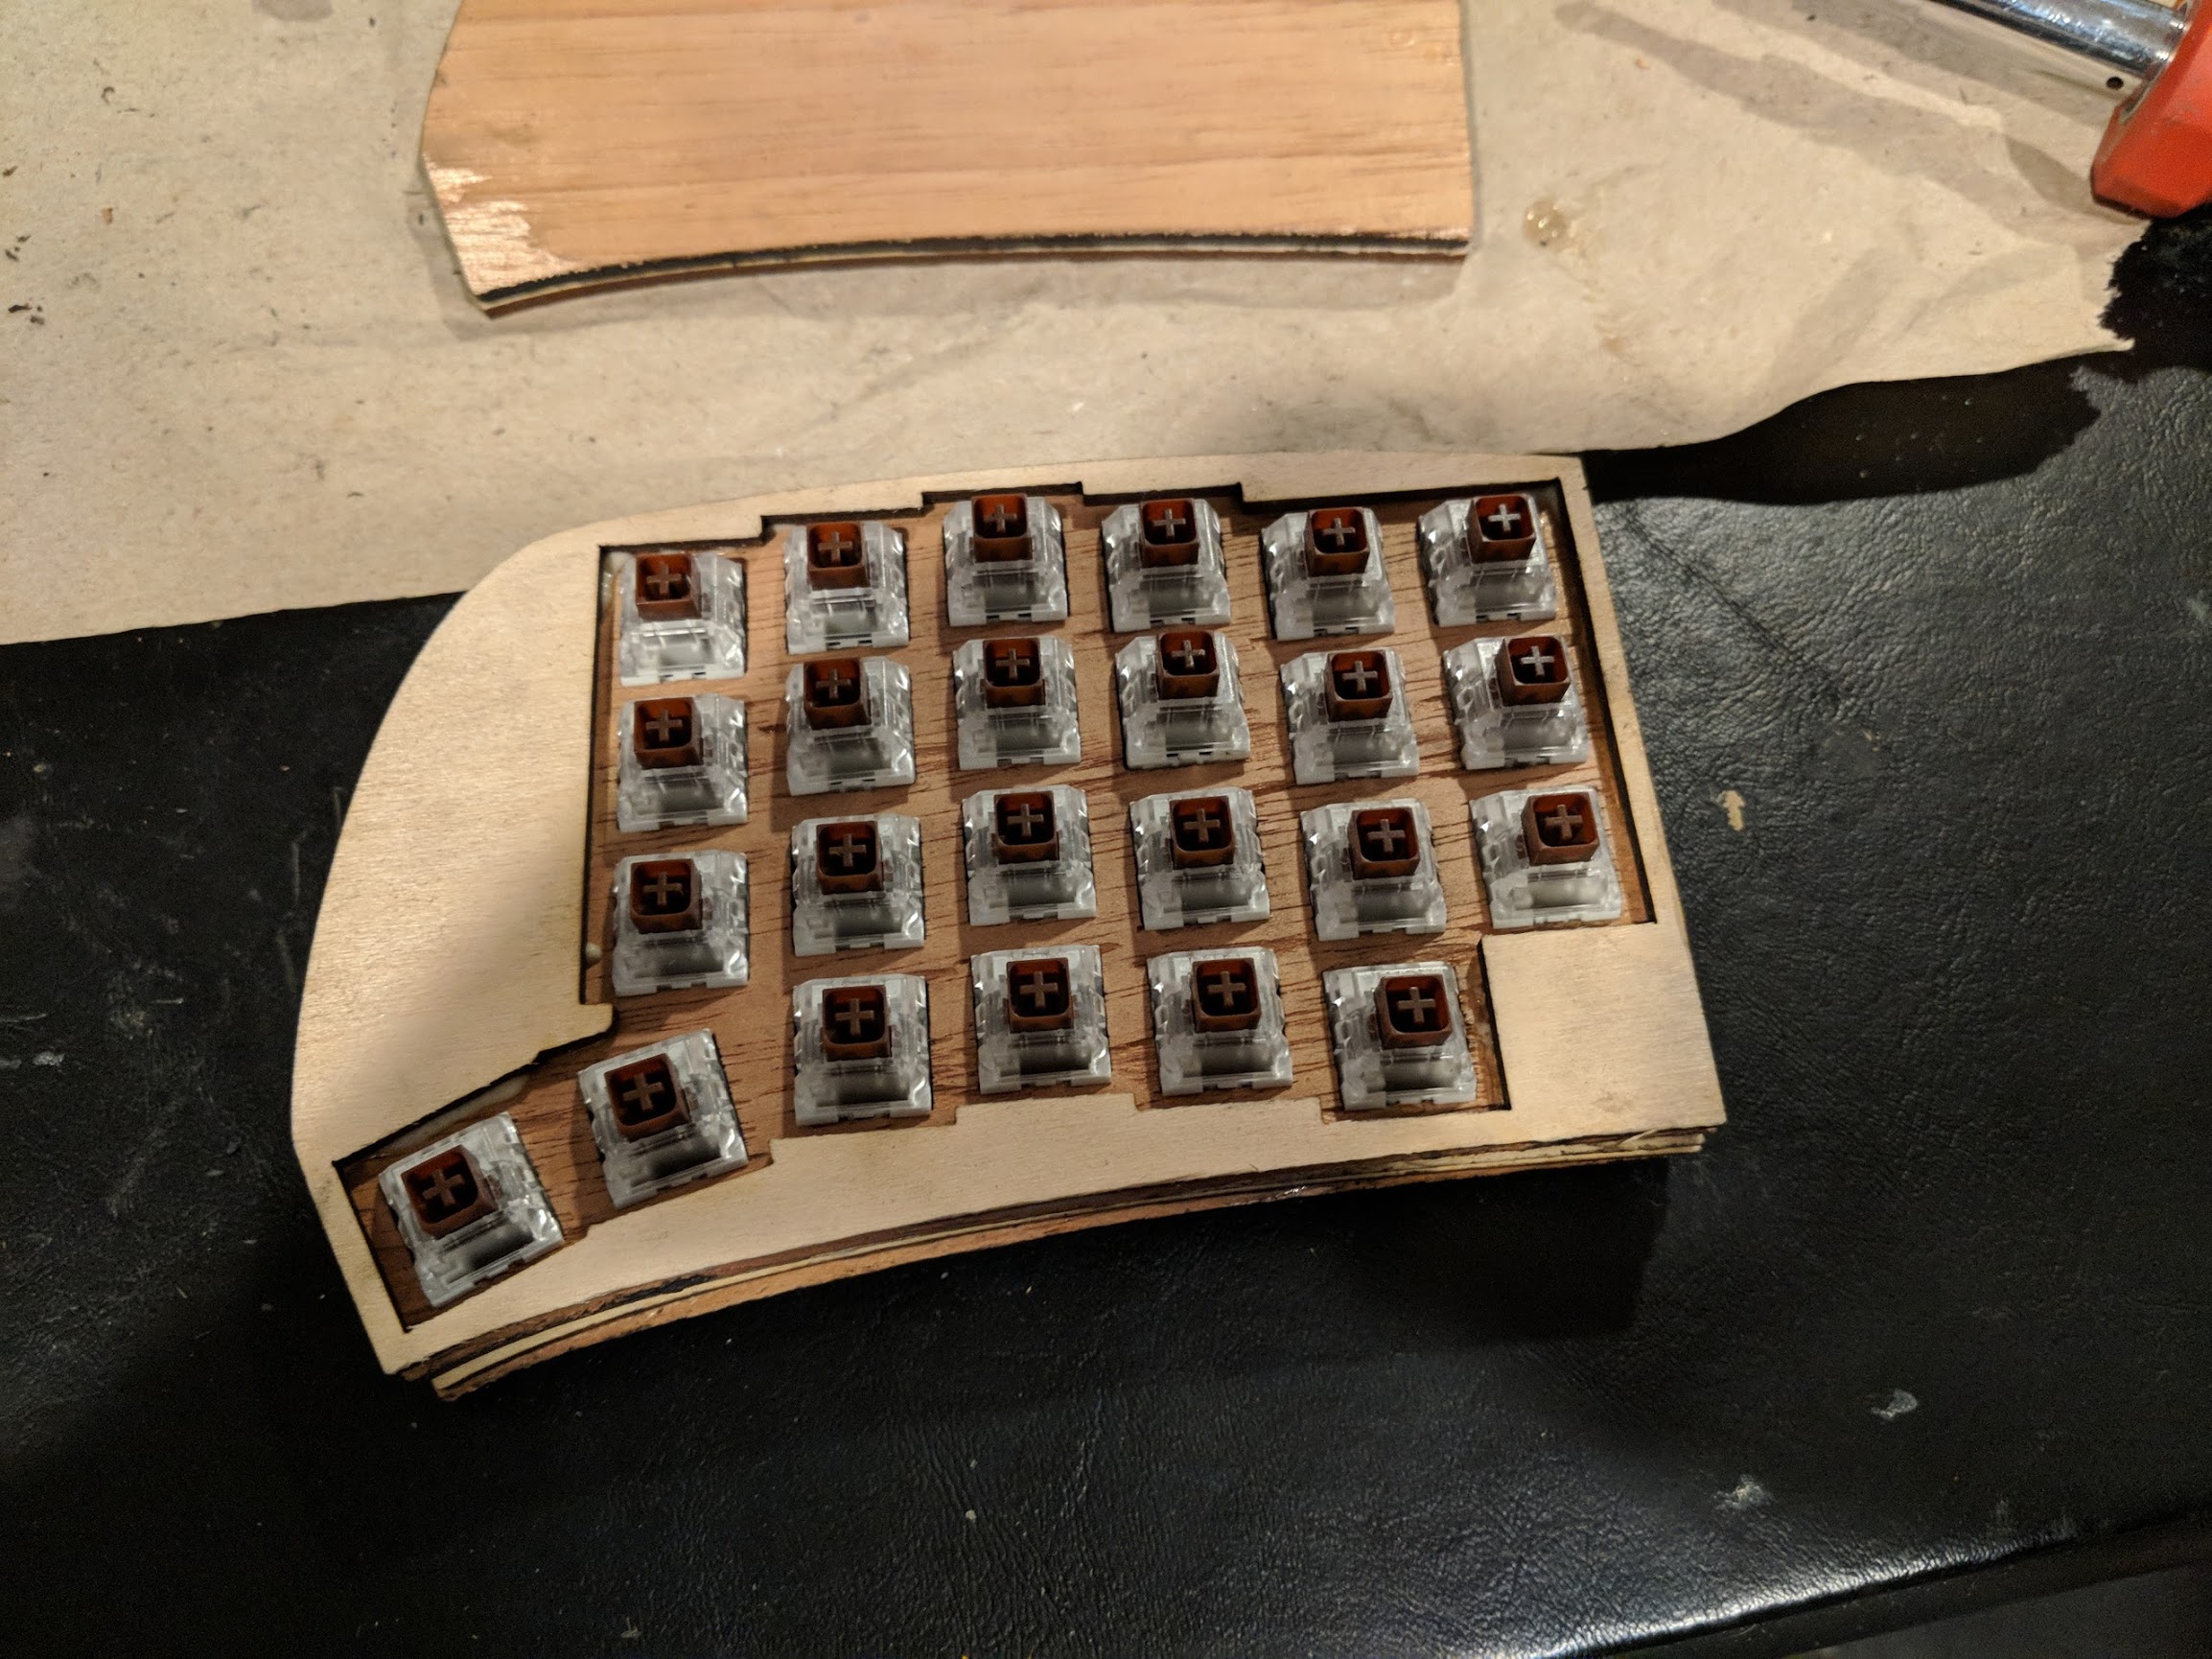
So I went that very same day to use their laser cutter, and cut some new plates out of some spare clear acrylic that was lying around.
This time, the keys fit with keycaps and all! The big secret was this. I exported all of my files as pdfs, and then printed them out to make sure the size was right first. When the pdf was then imported into the laser software, it brought a dimensional component with it, unlike the svg I guess.
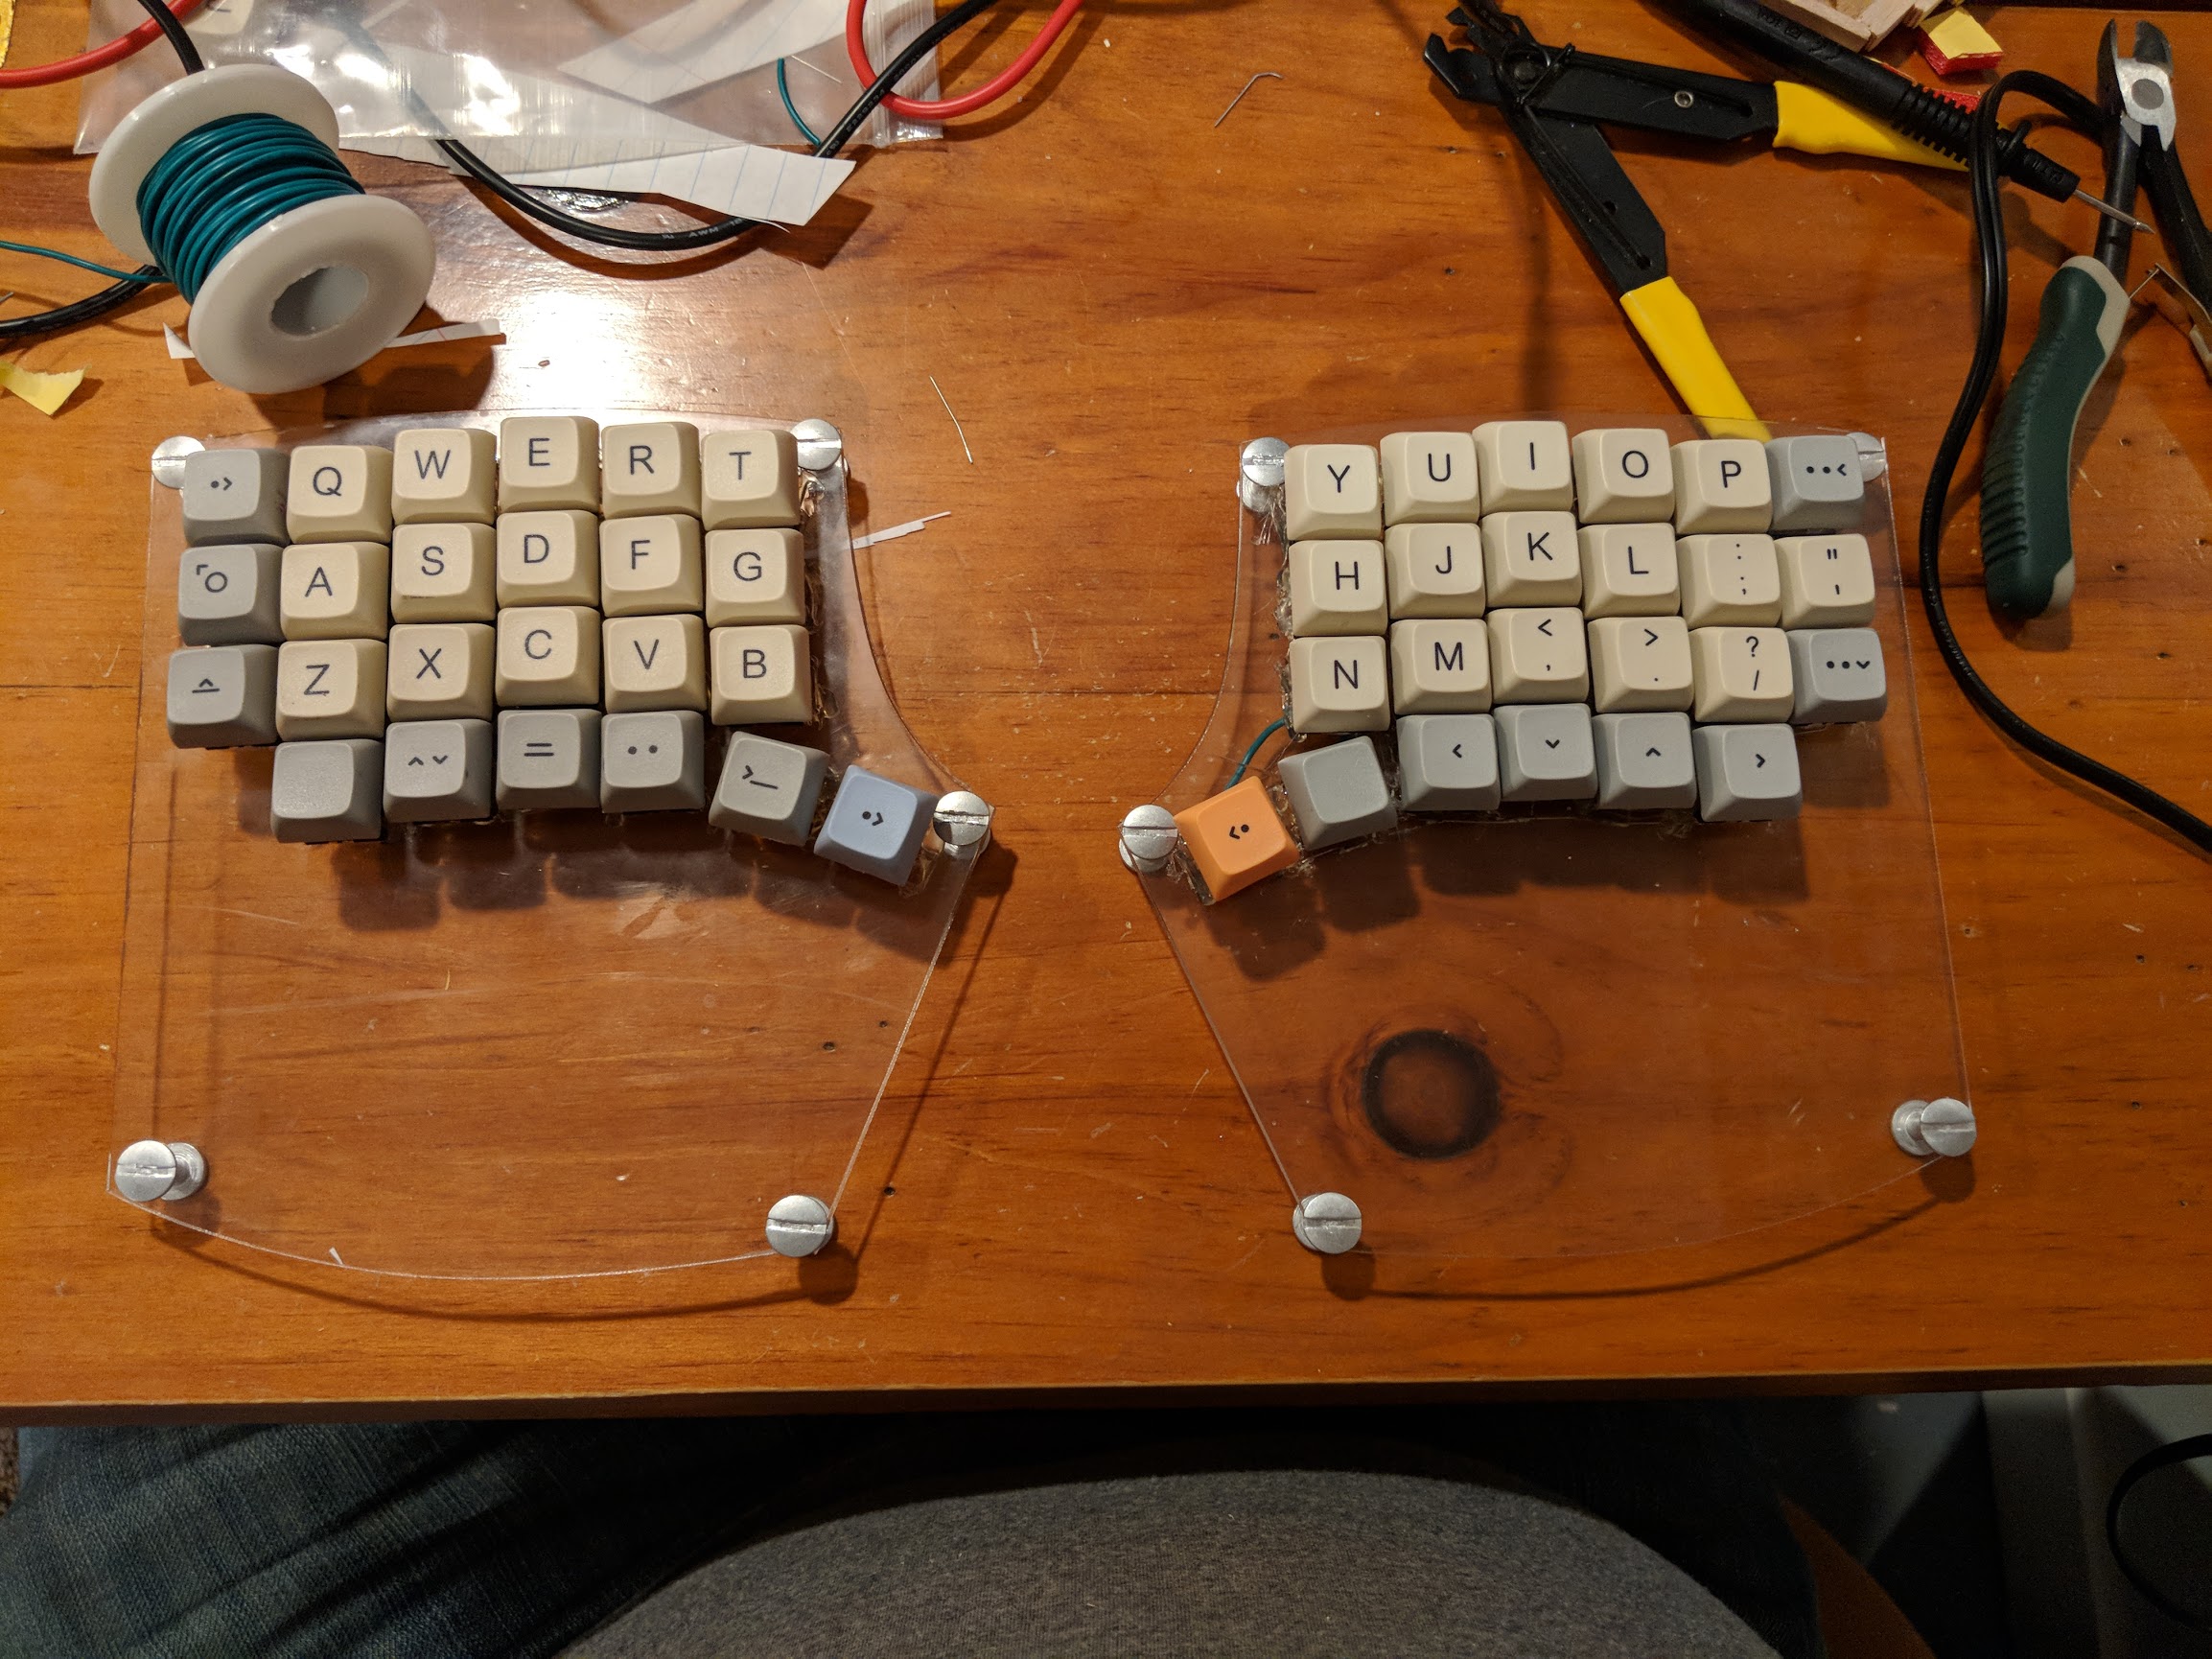
Next was actually the annoying but fun part, soldering all of the switches. I read around a few guides and honestly, mostly I just looked at this picture I found of someone who had hand soldered their own let’s split instead of paying the $8 for the pair of pcbs. That seems like crazy talk to me, but hey, to each their own.
The trick to getting this all right was that the bottom row was shifted one column over. So long as I kept it in the same grid used in the original let’s split, there should be no reason that the firmware shouldn’t work. Plus, I’d potentially have access to other people’s let’s split layouts which seemed like it might be good. (Not that I actually used any of them).
I made two minor mistakes in my initial soldering: A) I didn’t leave any extra slack on the end of my hookup wire, so I had to solder on more. B) I used solid core hookup wire instead of braided wire which I think would have been more flexible.
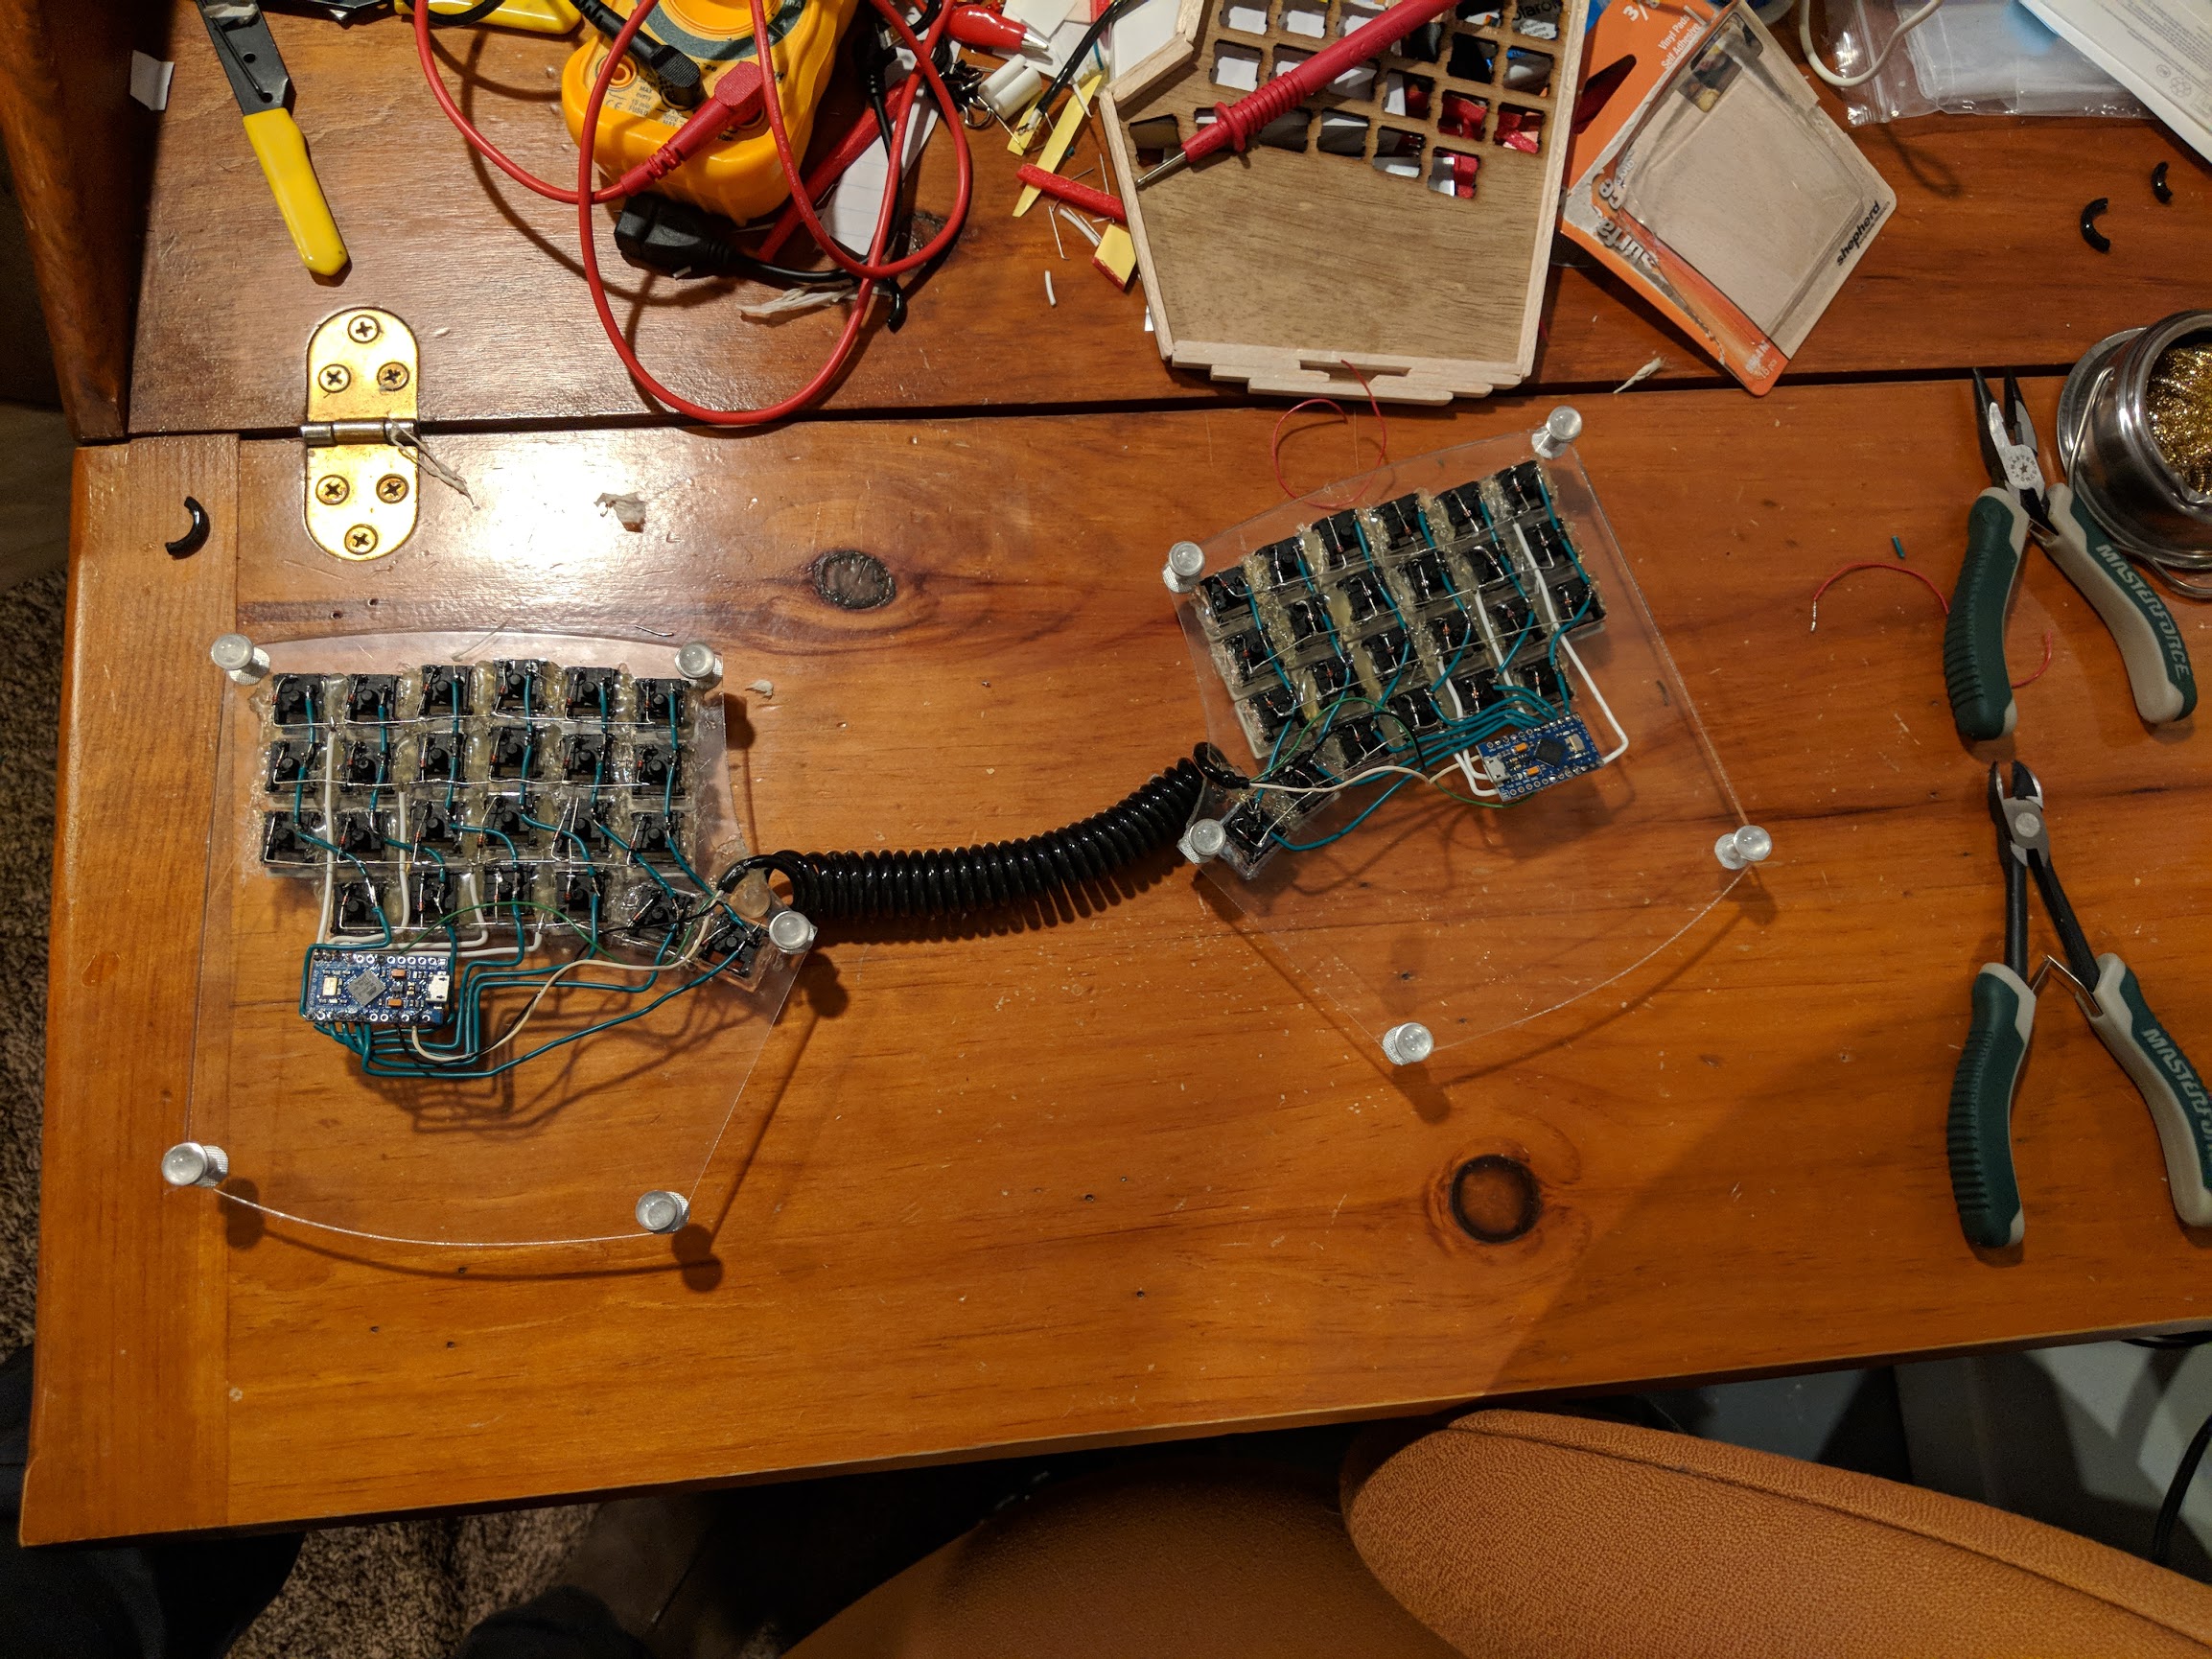
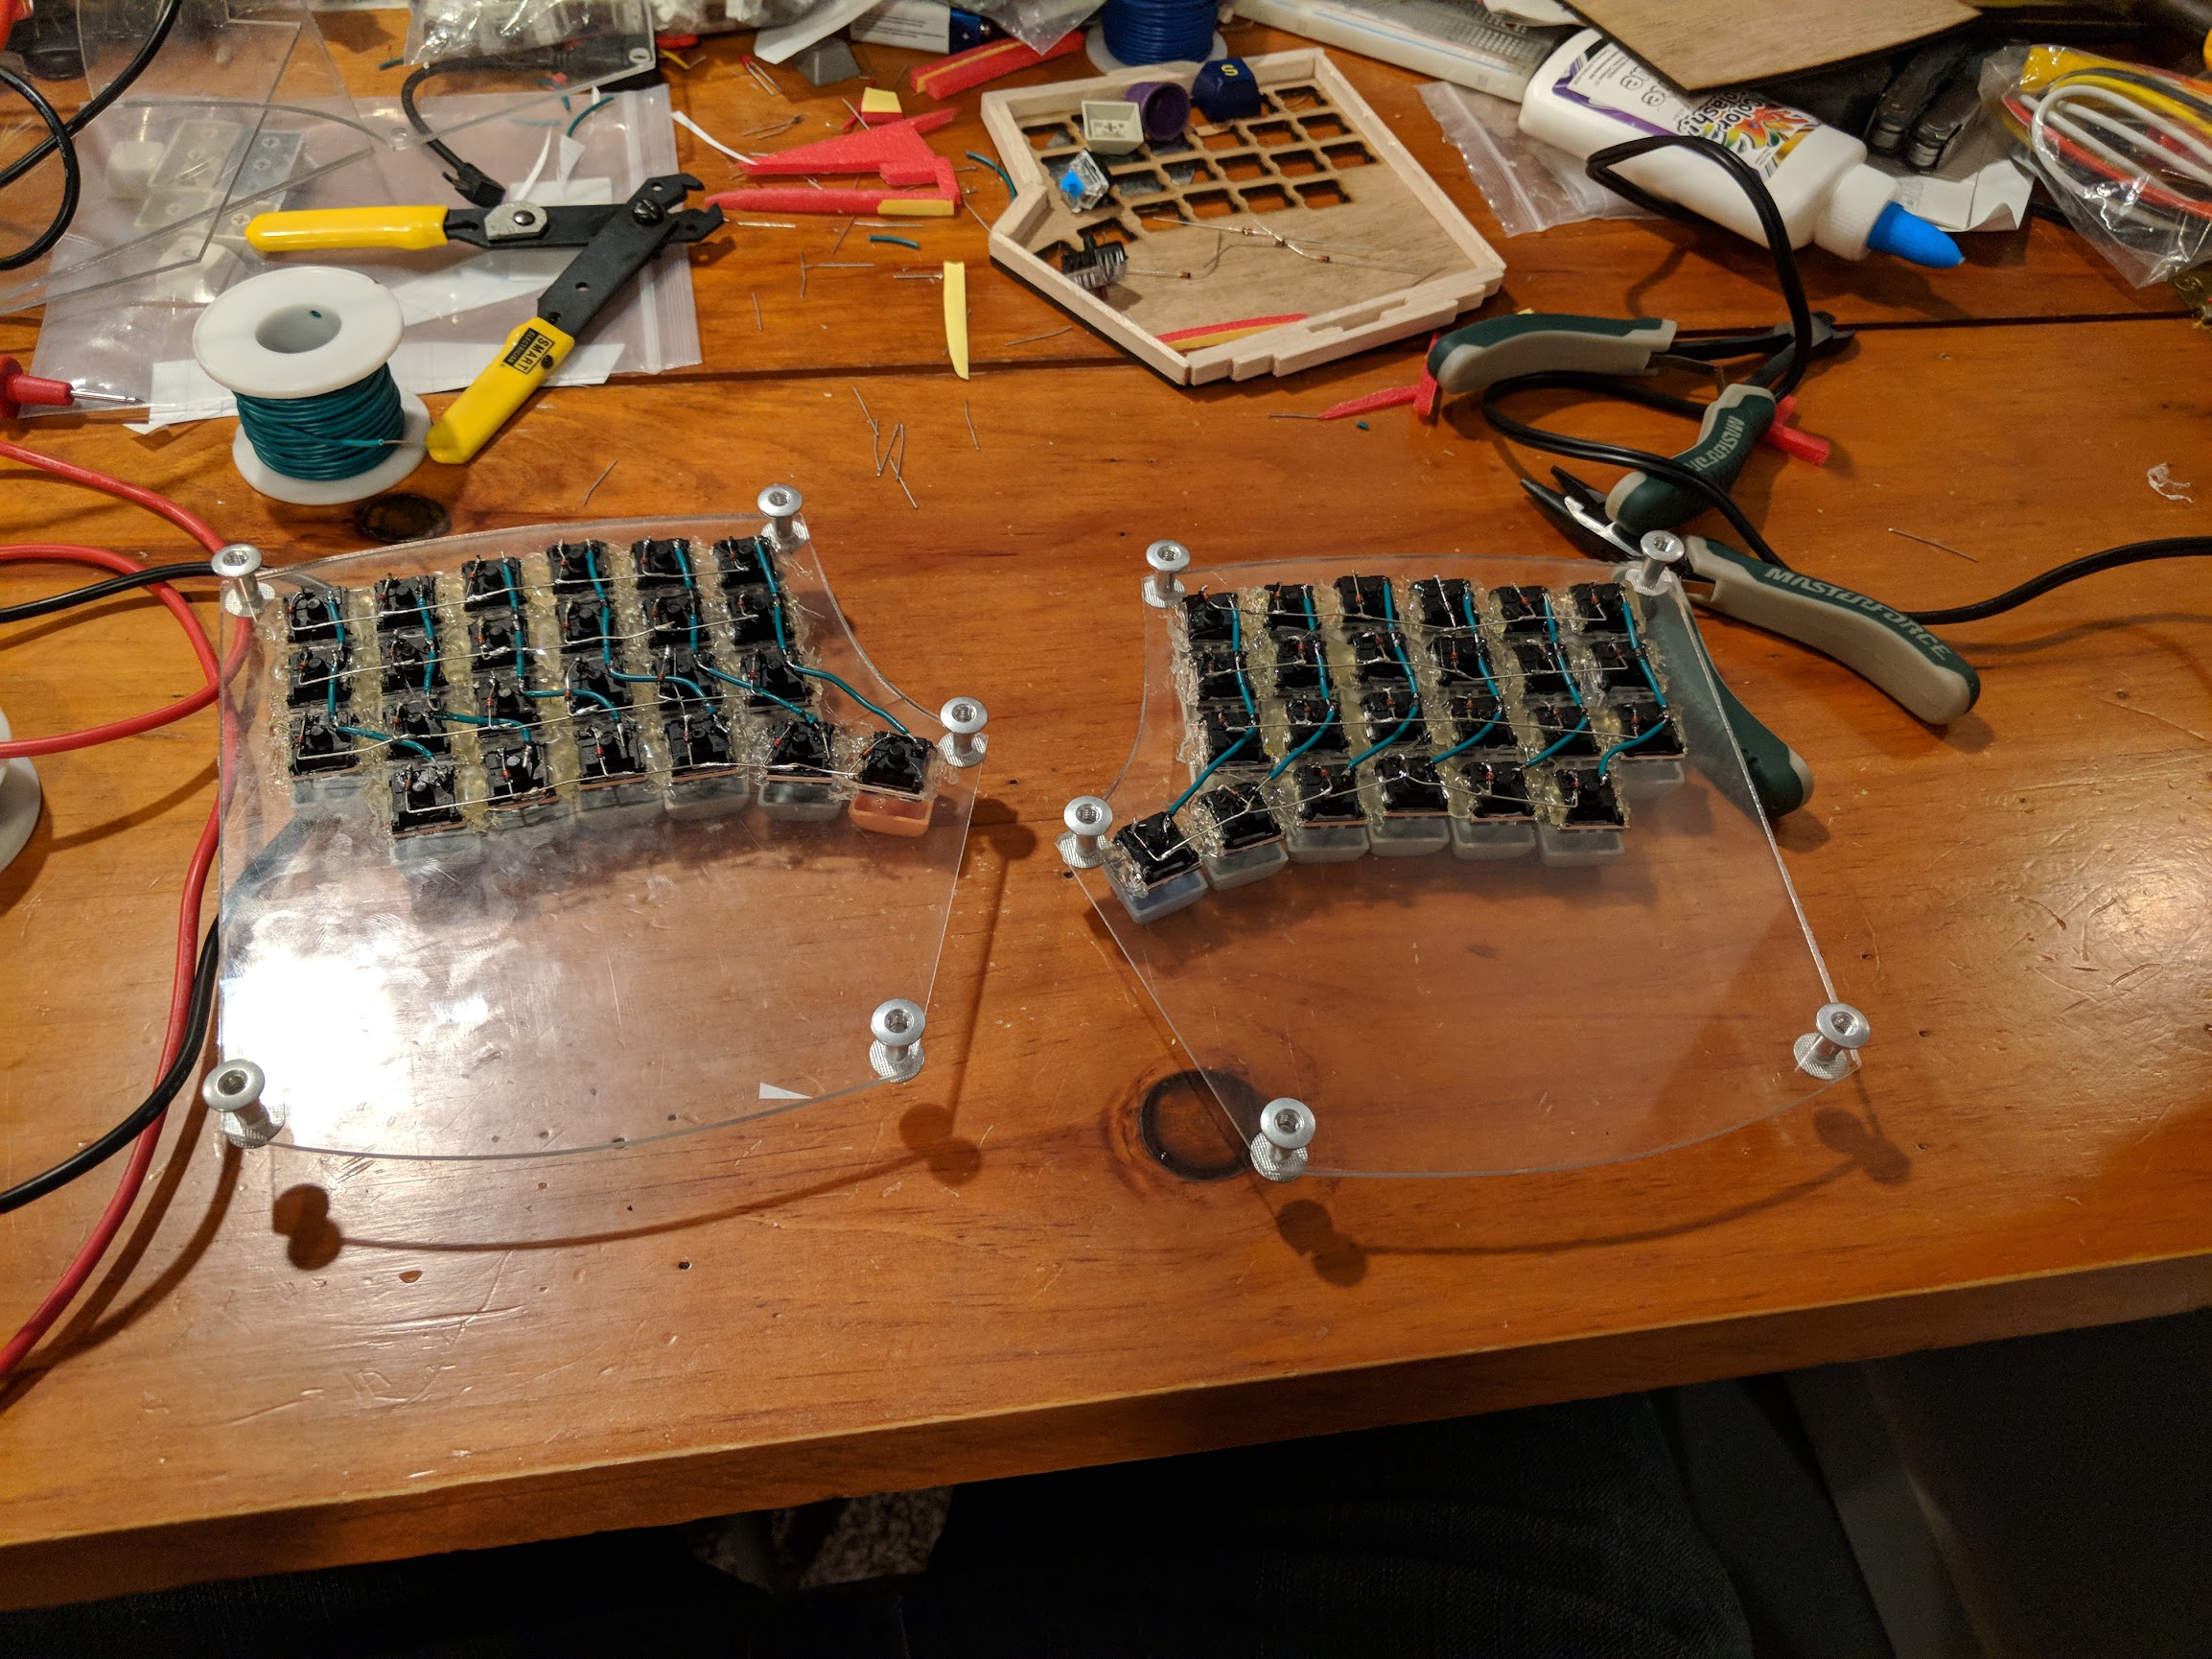
It works! But I did make a couple of minor errors. First, the rows are defined bottom to top, not top to bottom so my rows are wired backwards. An easy firmware fix as it turns out. Second, a couple of the keys were not as well soldered as I thought and I had to go back and hook them back up.
It actually works pretty well, and I’m so happy with it that I already started building the Rev 2. Instead of having the arduino down in a wrist rest that’s too short to be useful, I’m putting them in the part of the keyboard that makes it actually look like a mitten. Thus defeating the name and making me look silly. But that’s okay because it fits better there and wrist rests made only of foam are better anyway. Plus it’ll be more portable. I also wanted to make it out of wood.
I haven’t decided for sure that I’m going to use the Kailh brown switches yet, but overall I’ve been pretty impressed with other switches they’ve made. The Rev 1 has the copper speed switches in it and I’m quite fond of them. I bought a 120 pack of the brown box switches because I’m good at spilling things, so I’ll probably just use em because as I said, I’m good at spilling things. Especially coffee. On my keyboard. All the time.
At any rate. Hope this has been informative. While I build the rev 2, I’ll try to put together an actual hand wiring guide. I hope this inspires you to build your own keyboard, because it’s really not as hard as you think it is!