
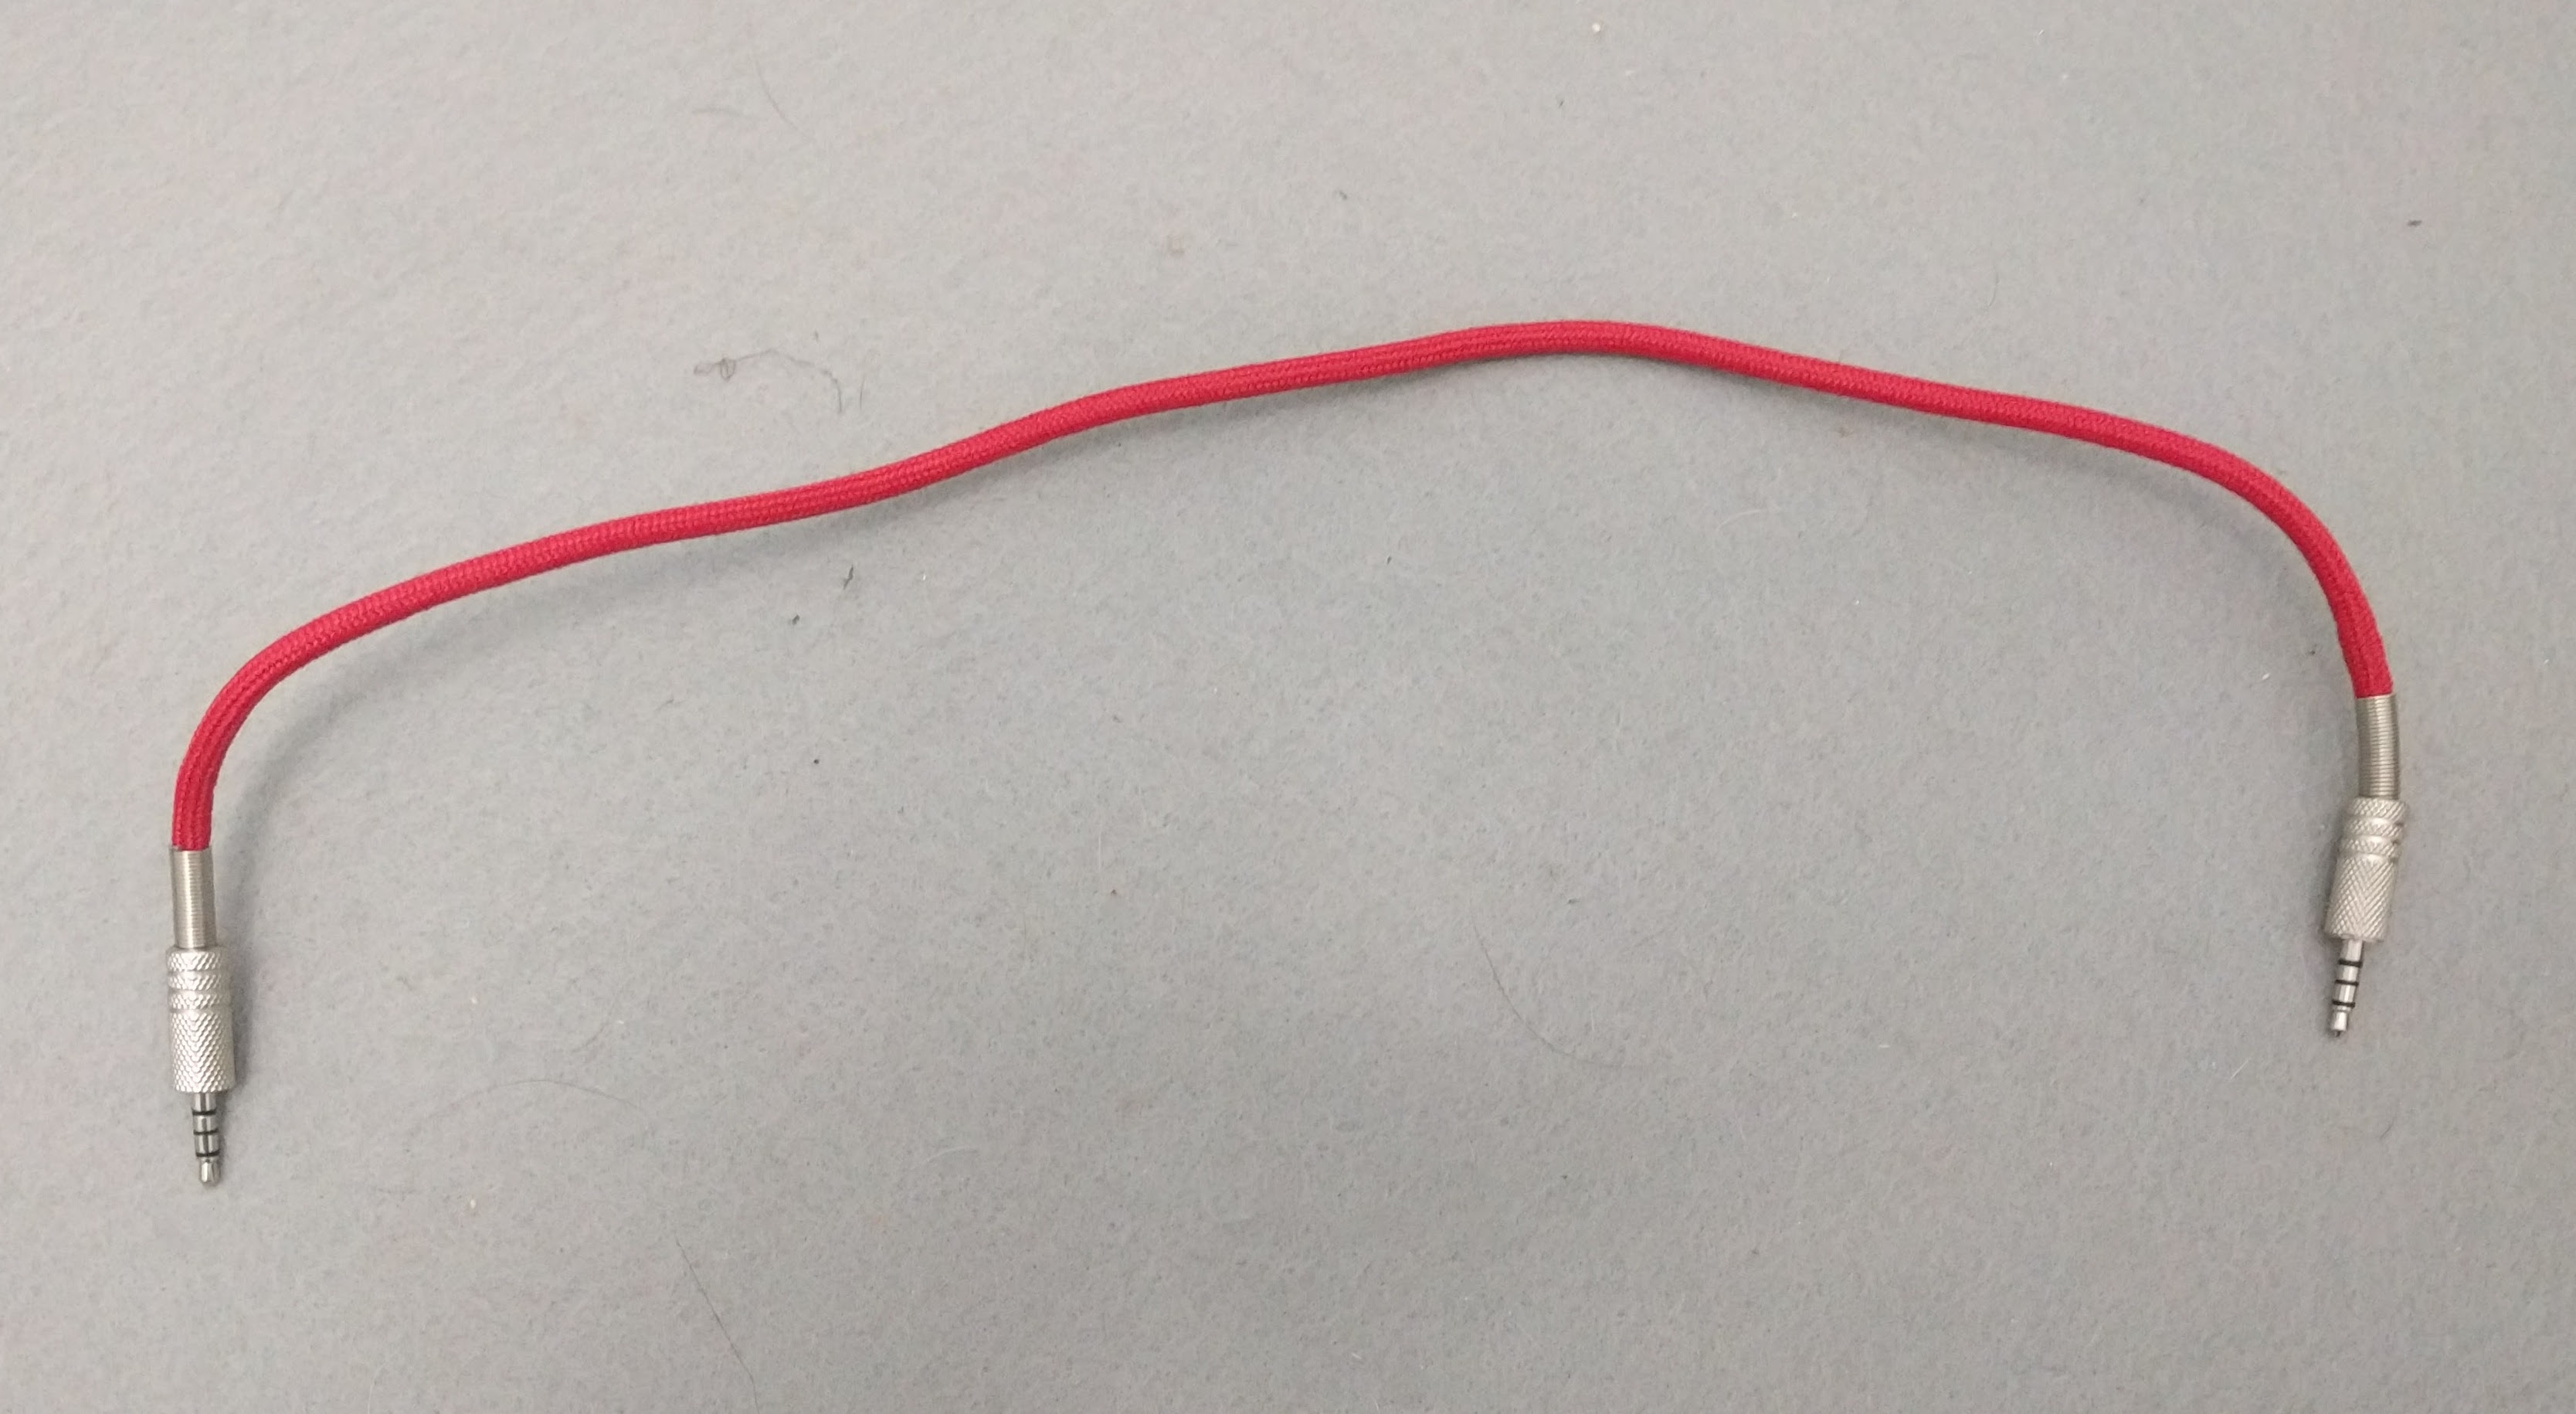
Custom Ergodox Connector Cable
I’m sure I’m not the only ergodox owner who has encountered the serious lack of good TRRS male to male cables. You can get them in a variety of lenghts, but they’re pretty much all black and if you’re cheap like me you just bought the cheapest one you thought would be long enough. In my case, I bought one I knew would be long enough and one I thought would be the right lenght and turned out to be WAY too short (6”).
I’ve been trying to decide how to remedy this. On one hand I didn’t want to spend money on a cable that I wasn’t A) sure was the right lenght and B) didn’t look nicer than the one I already have. While there isn’t anything particularly wrong with having a 3’ cable coiled on my desk between the two halves of my keyboard, for something I built myself it feels a little silly. So I thought to myself, what should I do about it. The answer was obvious to me (and I’m sure for you too since you probably read the post title.) DIY.
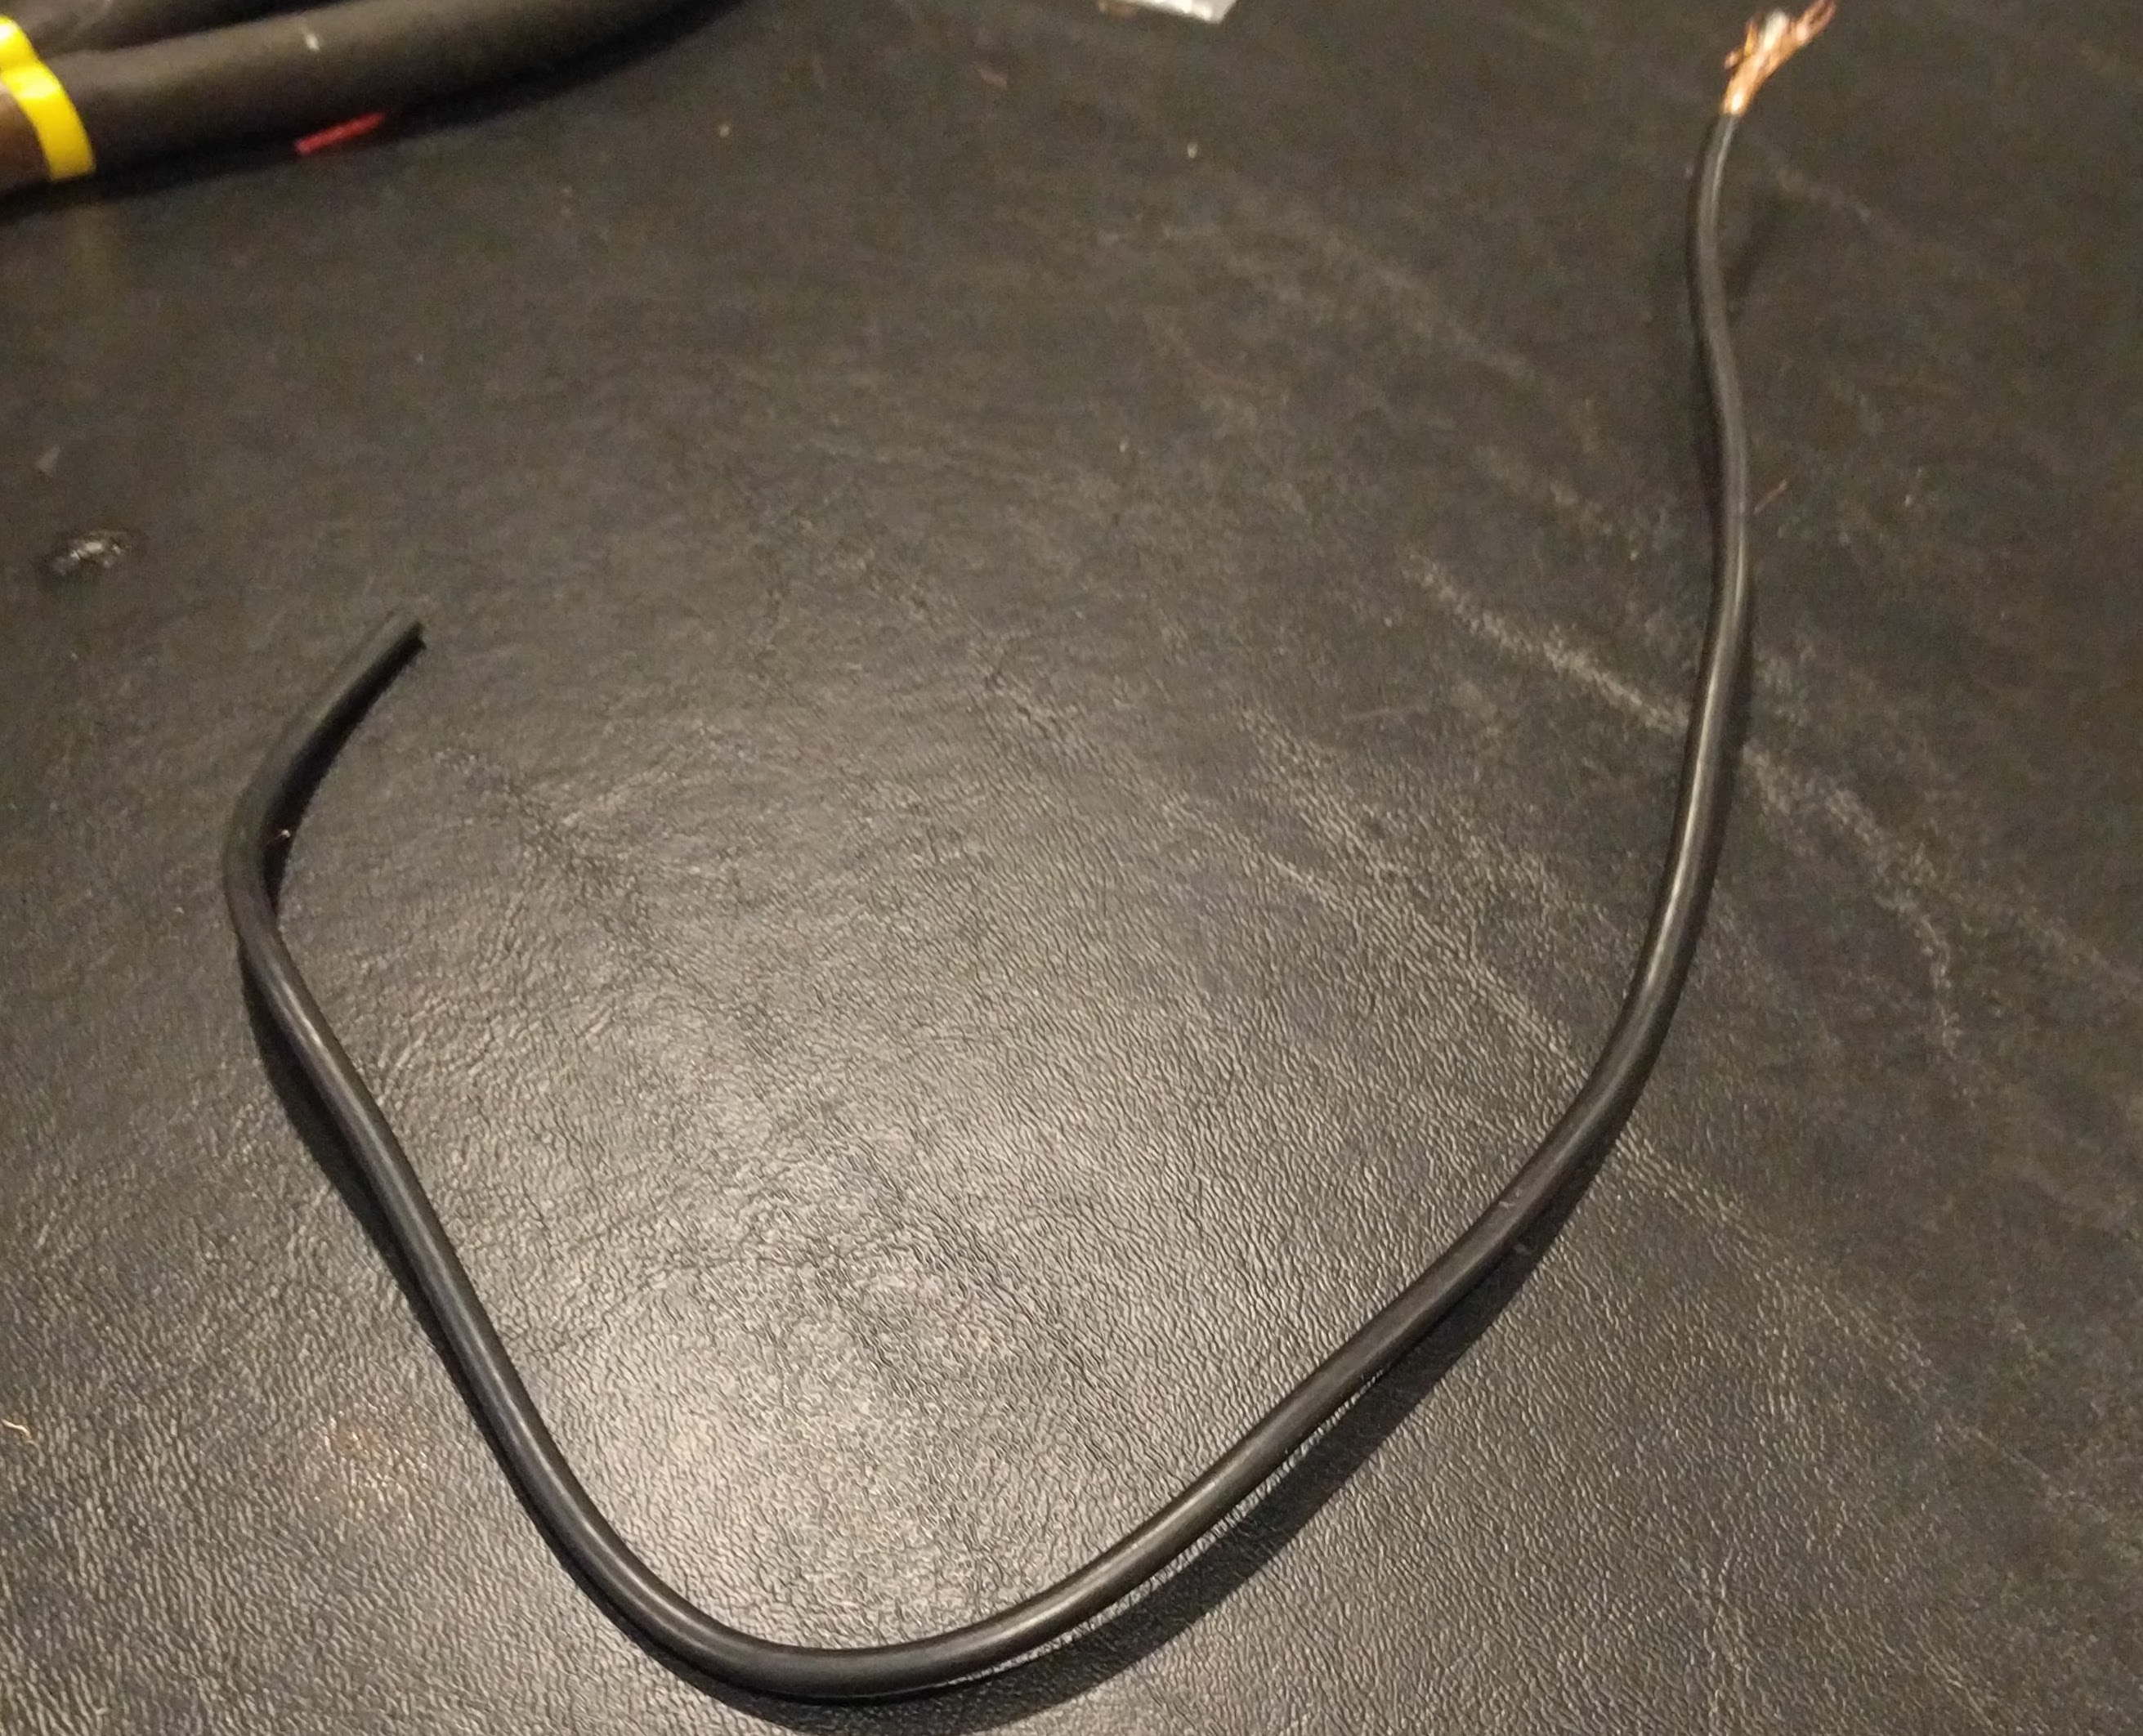
I already have leftover 4 contact cable from buiding the keyboard. That step where you mutilate a micro-usb cable so that you can use it to connect the teensy to the main board. The question was how to use it to make something special, and that reminded me of something I read a while ago. Someone using parachute cord sheathing to cover cables and putting custom ends on.
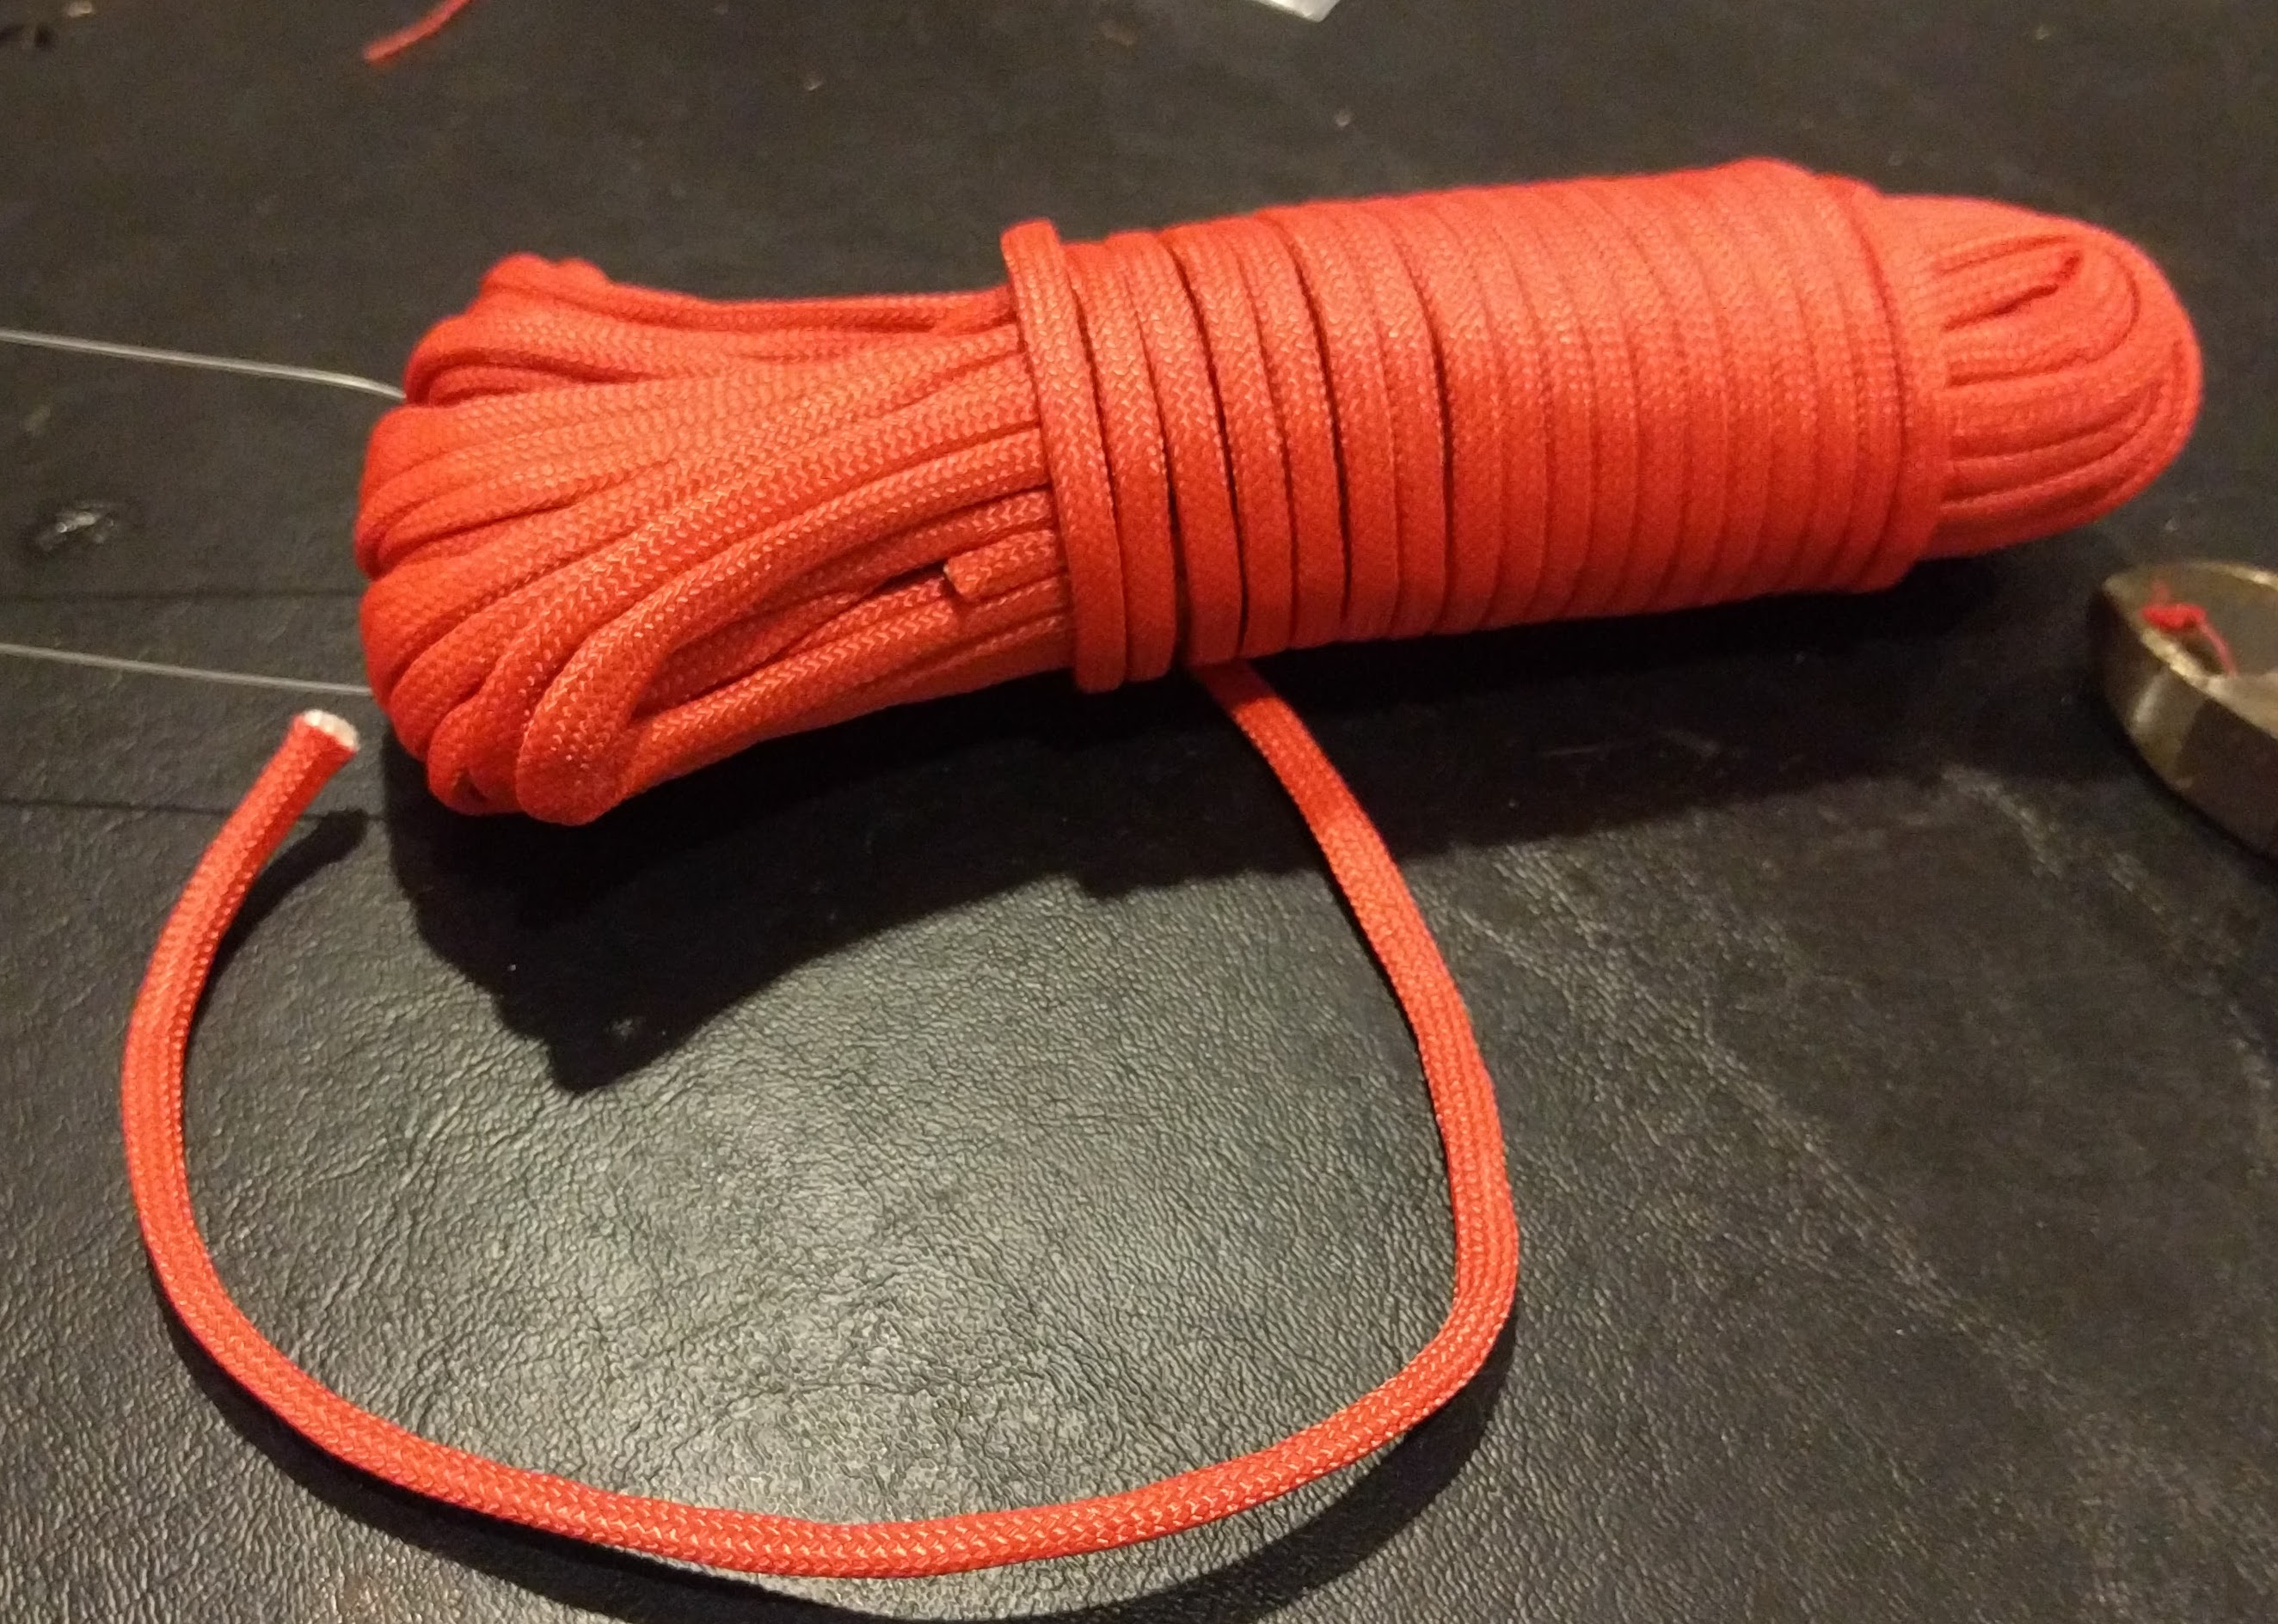
That led me to this product. With that, some parachute cable I had laying around and the leftover cable, I figured I could build myself a pretty sweet connector. And I would be able to make it JUST the right lenght since I was making it myself. For those of you who don’t have parachute cord around or know what it is, it’s this stuff. I got mine at the hardware store ~$3 for 50’.
While I hope this goes without saying, attempt this project at your own risk. If you swap around the contacts in a bad way you could seriously screw up your ergodox and it would super suck to have to re-build it.
First thing to start with is sizing up the cable. I tend to keep my keyboard havles about 10” apart, so I went and sized this to be about 16”, that gives me a bit of extra to mess up the ends. Remeber to give yourself both space on both ends for both the distance from the edge of the keyboard to the port, but also for space inside the adapters for the 90º turn. If you’re worried, you may want to cut the cable a little long, put the plugs on the end and try it out to make sure it’s a good length.
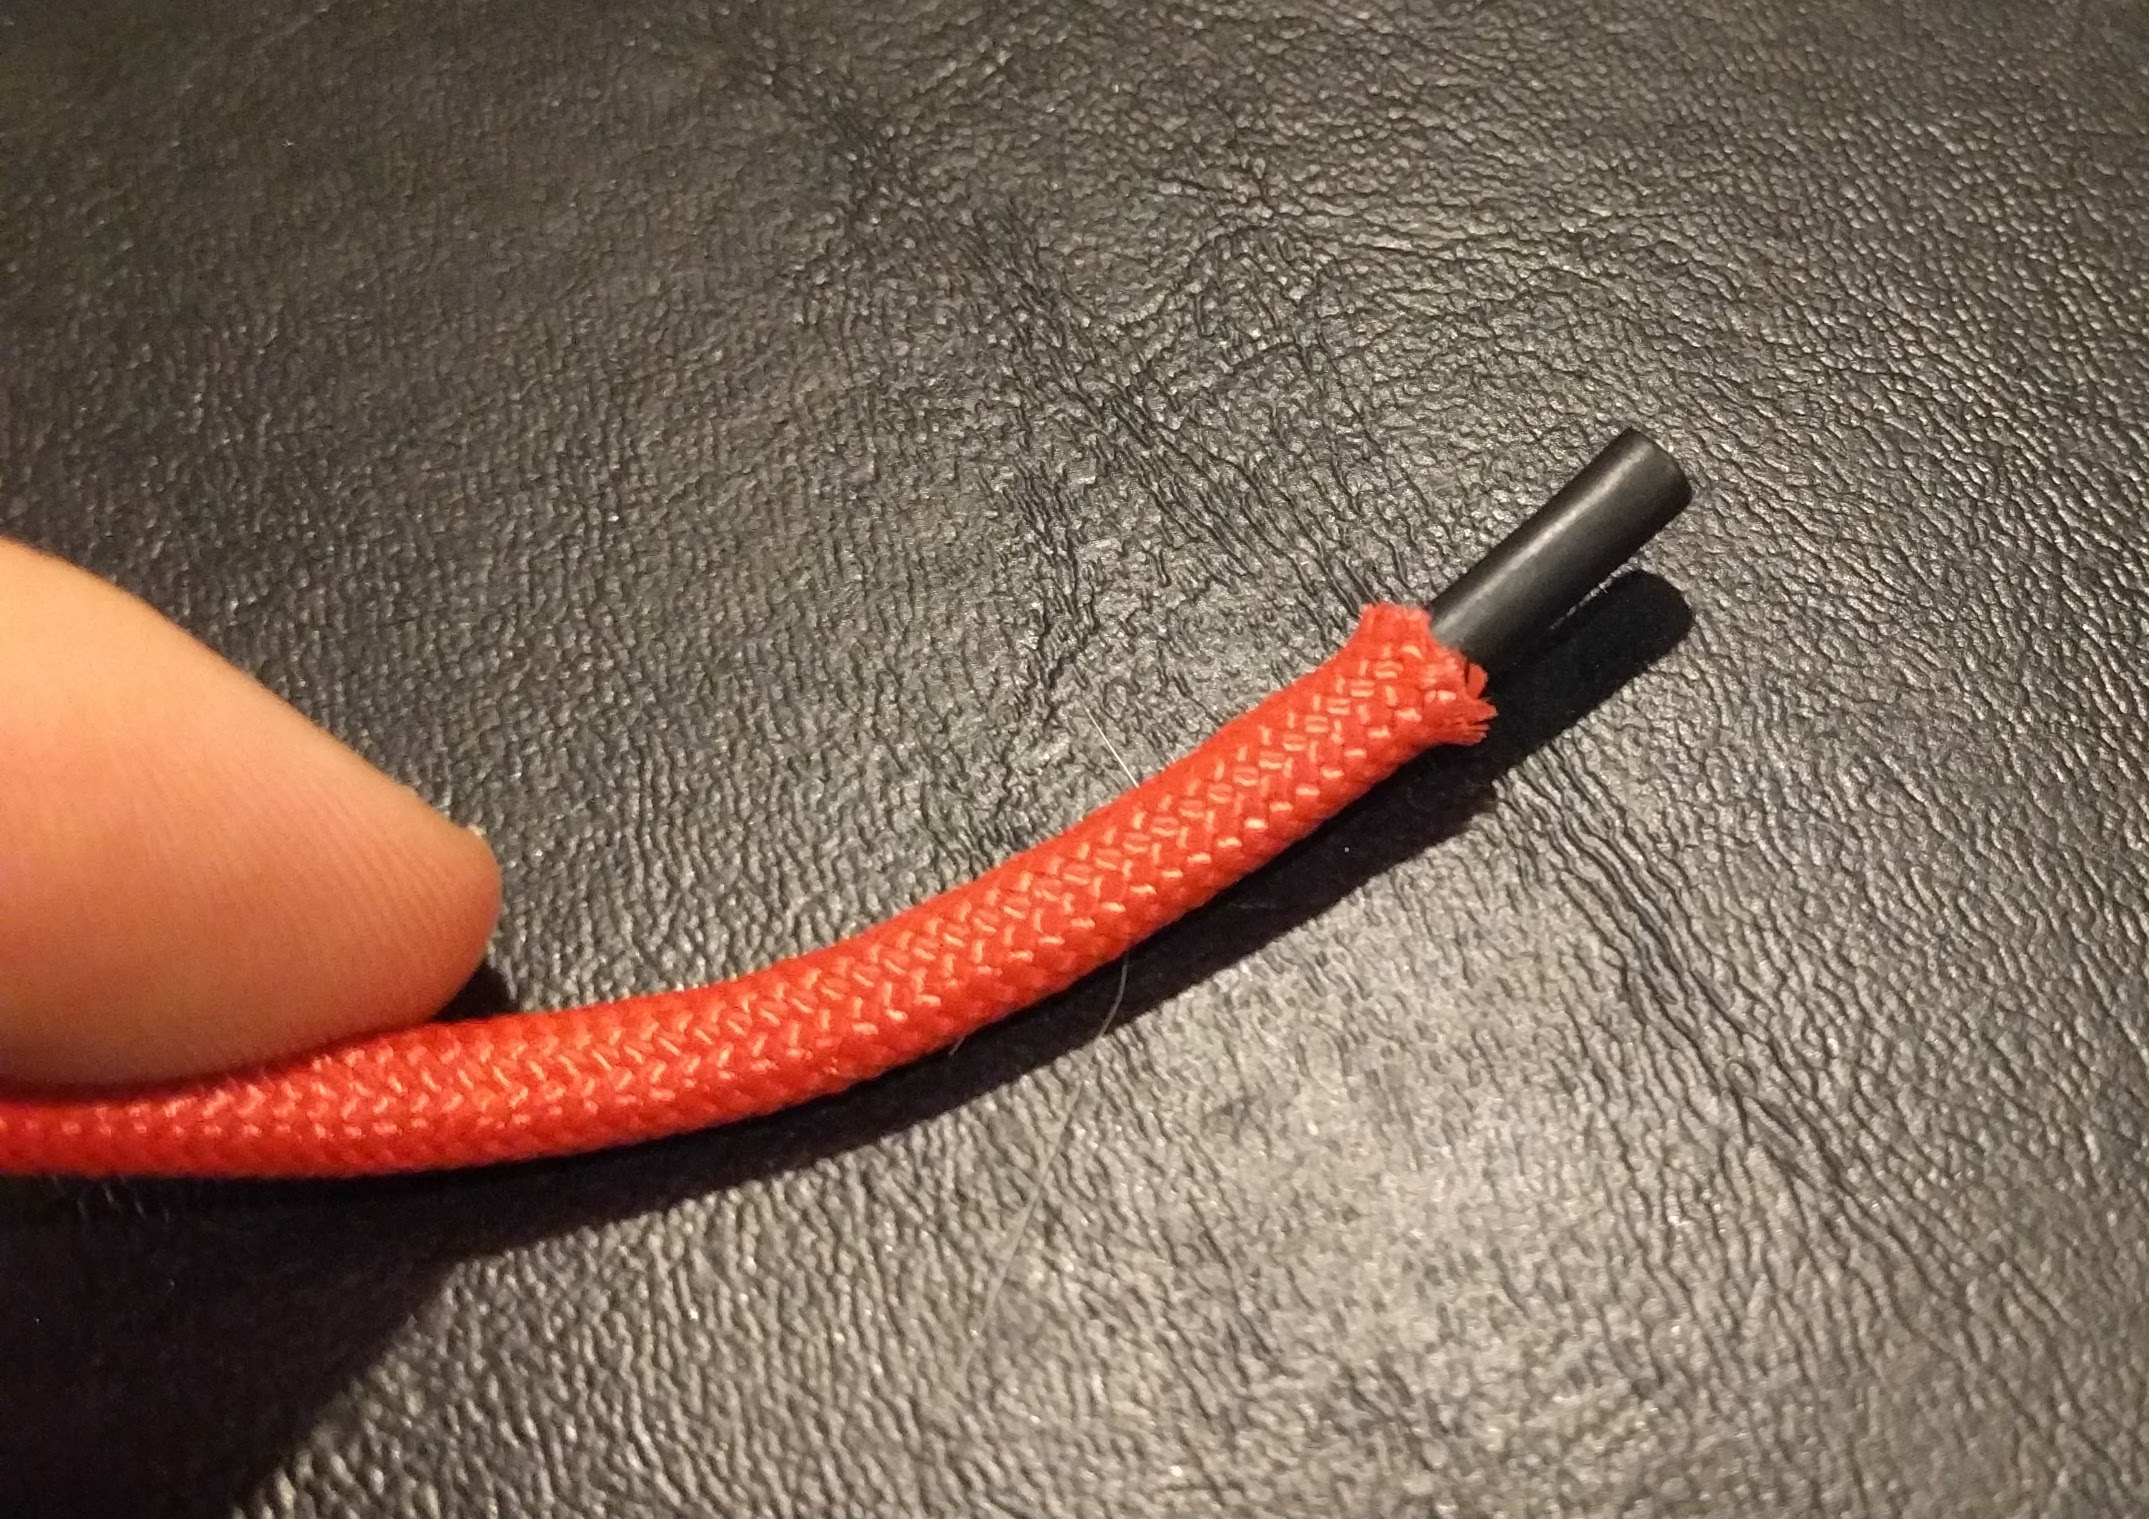
After getting the cable the right lenght, it’s time to mutlate the para-cord. Start by cutting the parachute cord about 3” longer than the cable you’ve got. Remember, you can always make it shorter but if you don’t give it some space, you can’t make it longer.
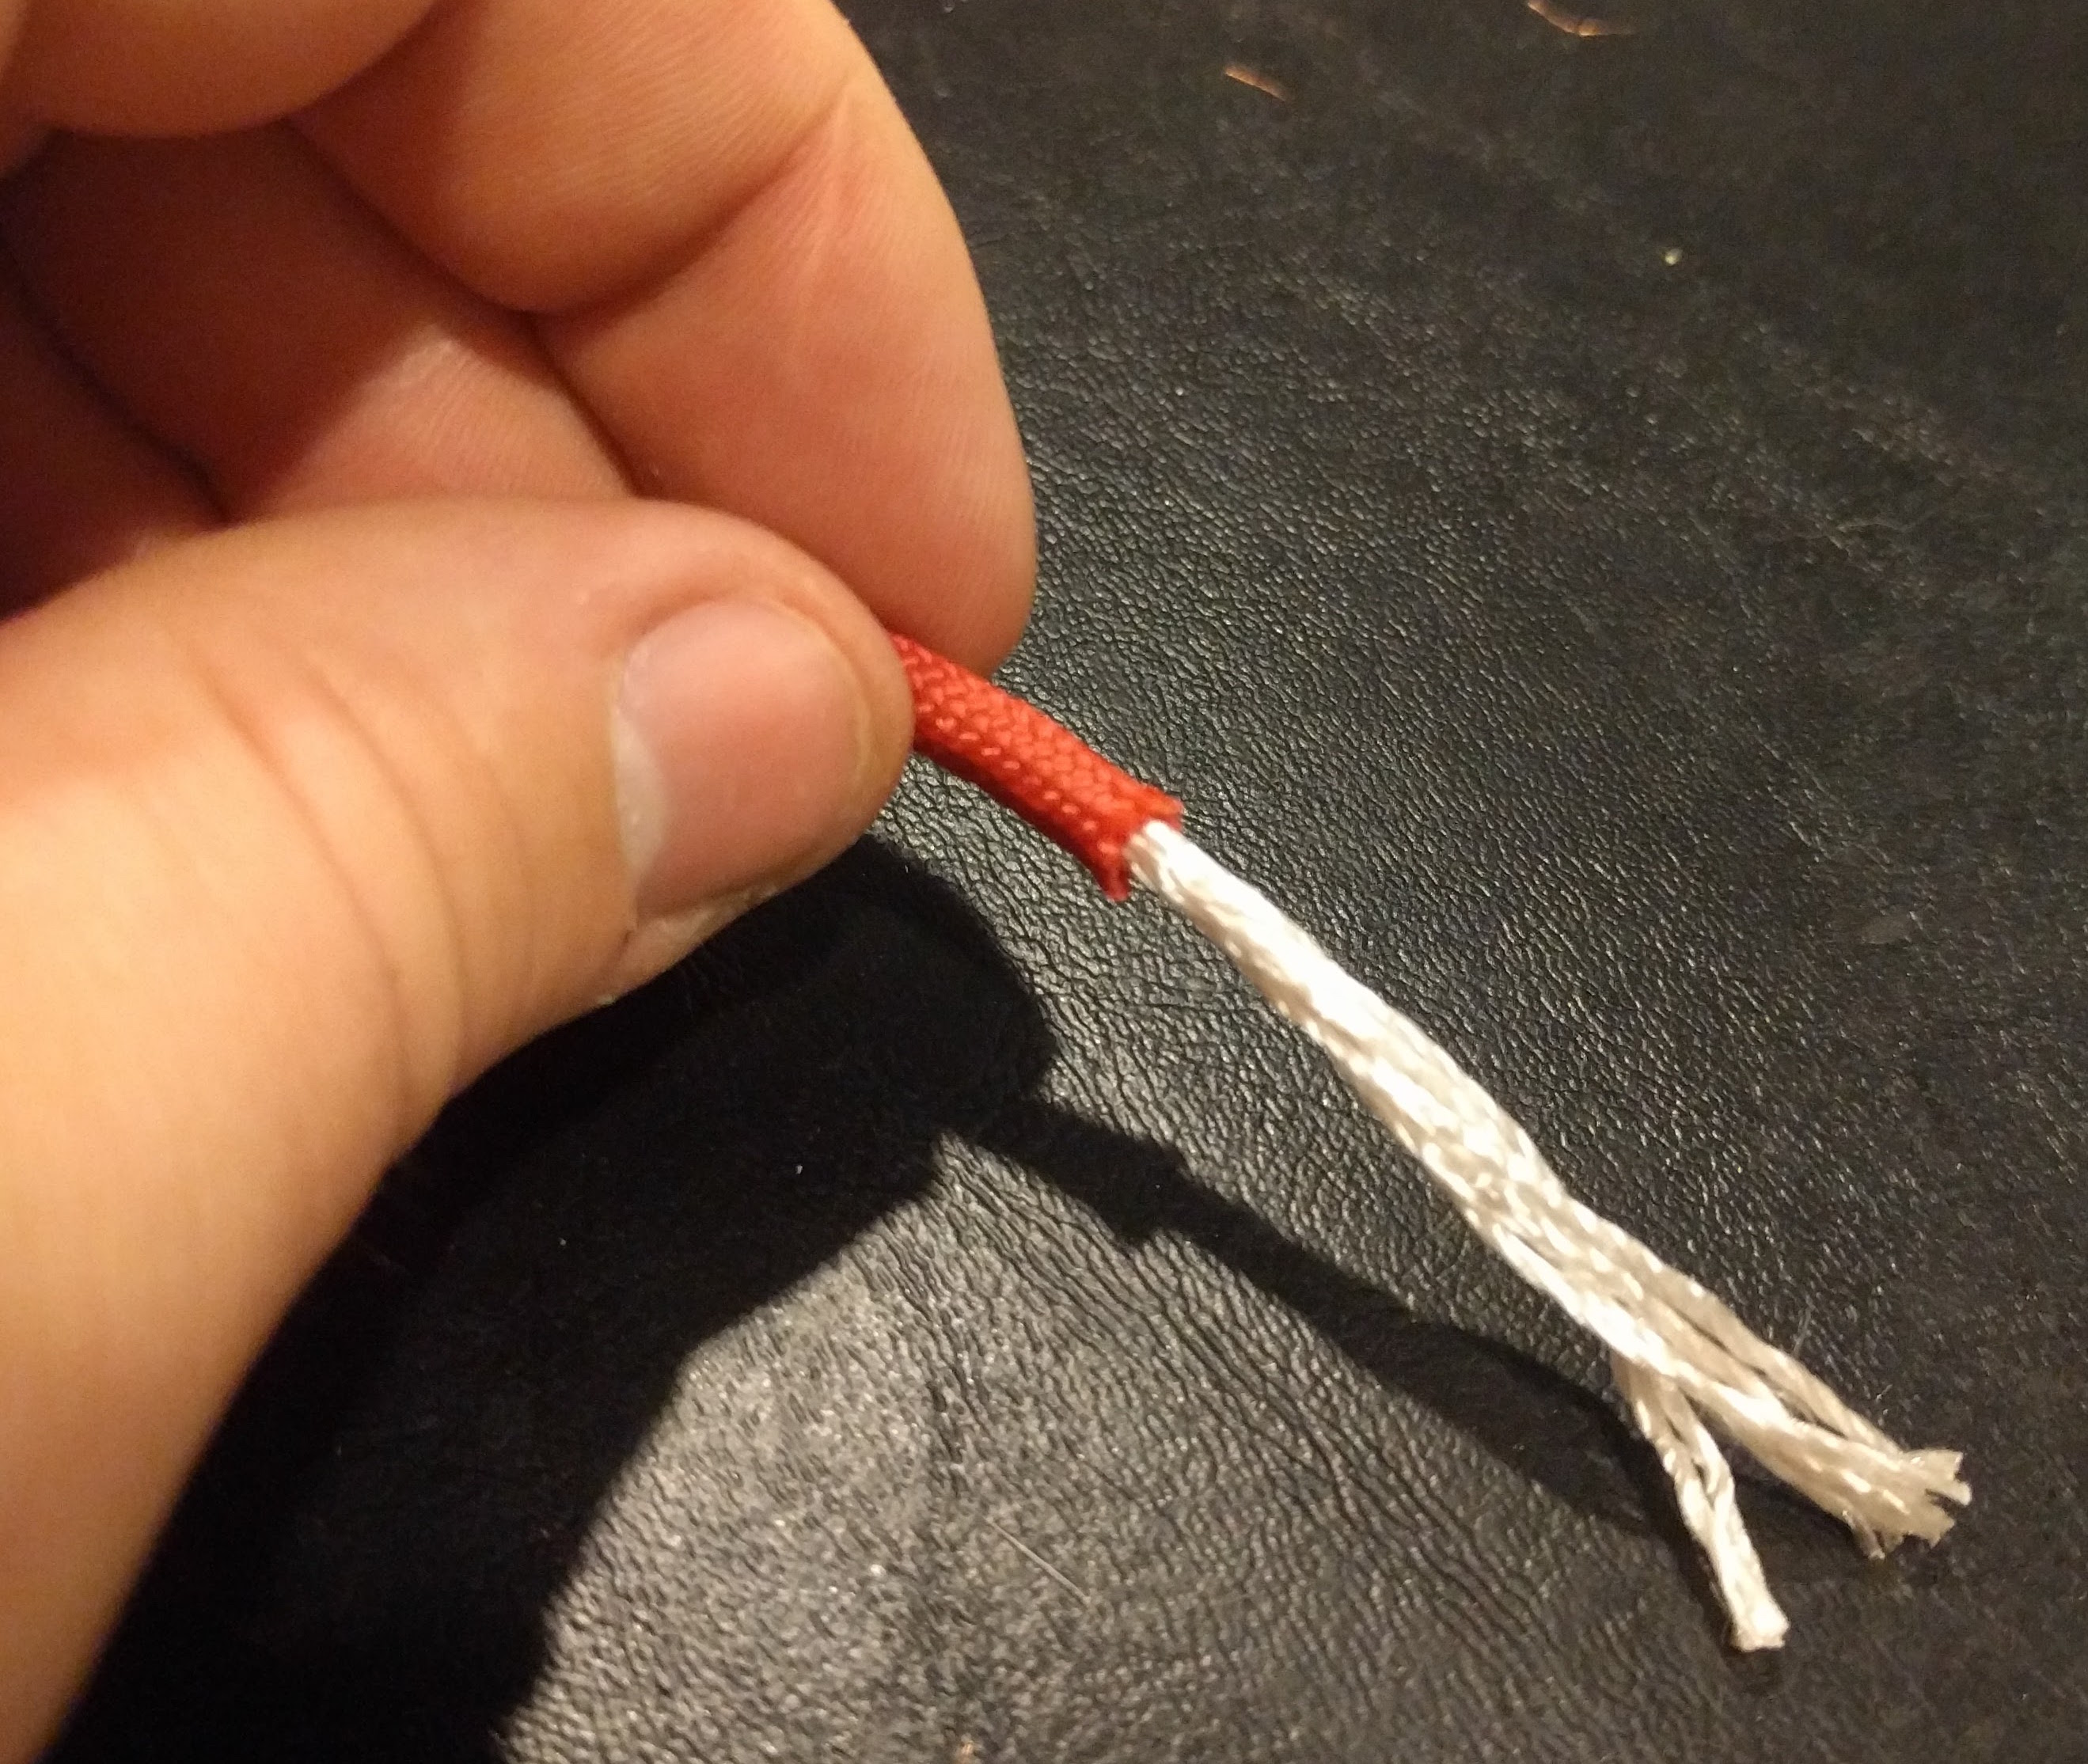
After you’ve got some exposed, be very careful pulling it out, on the opposite end from where you’re pulling, make sure to hold on to the sheathing, otherwise you risk doubling over the sheathing inside which makes it end up both much shorter than you expect, and also your cable may not fit inside the doubled over version.
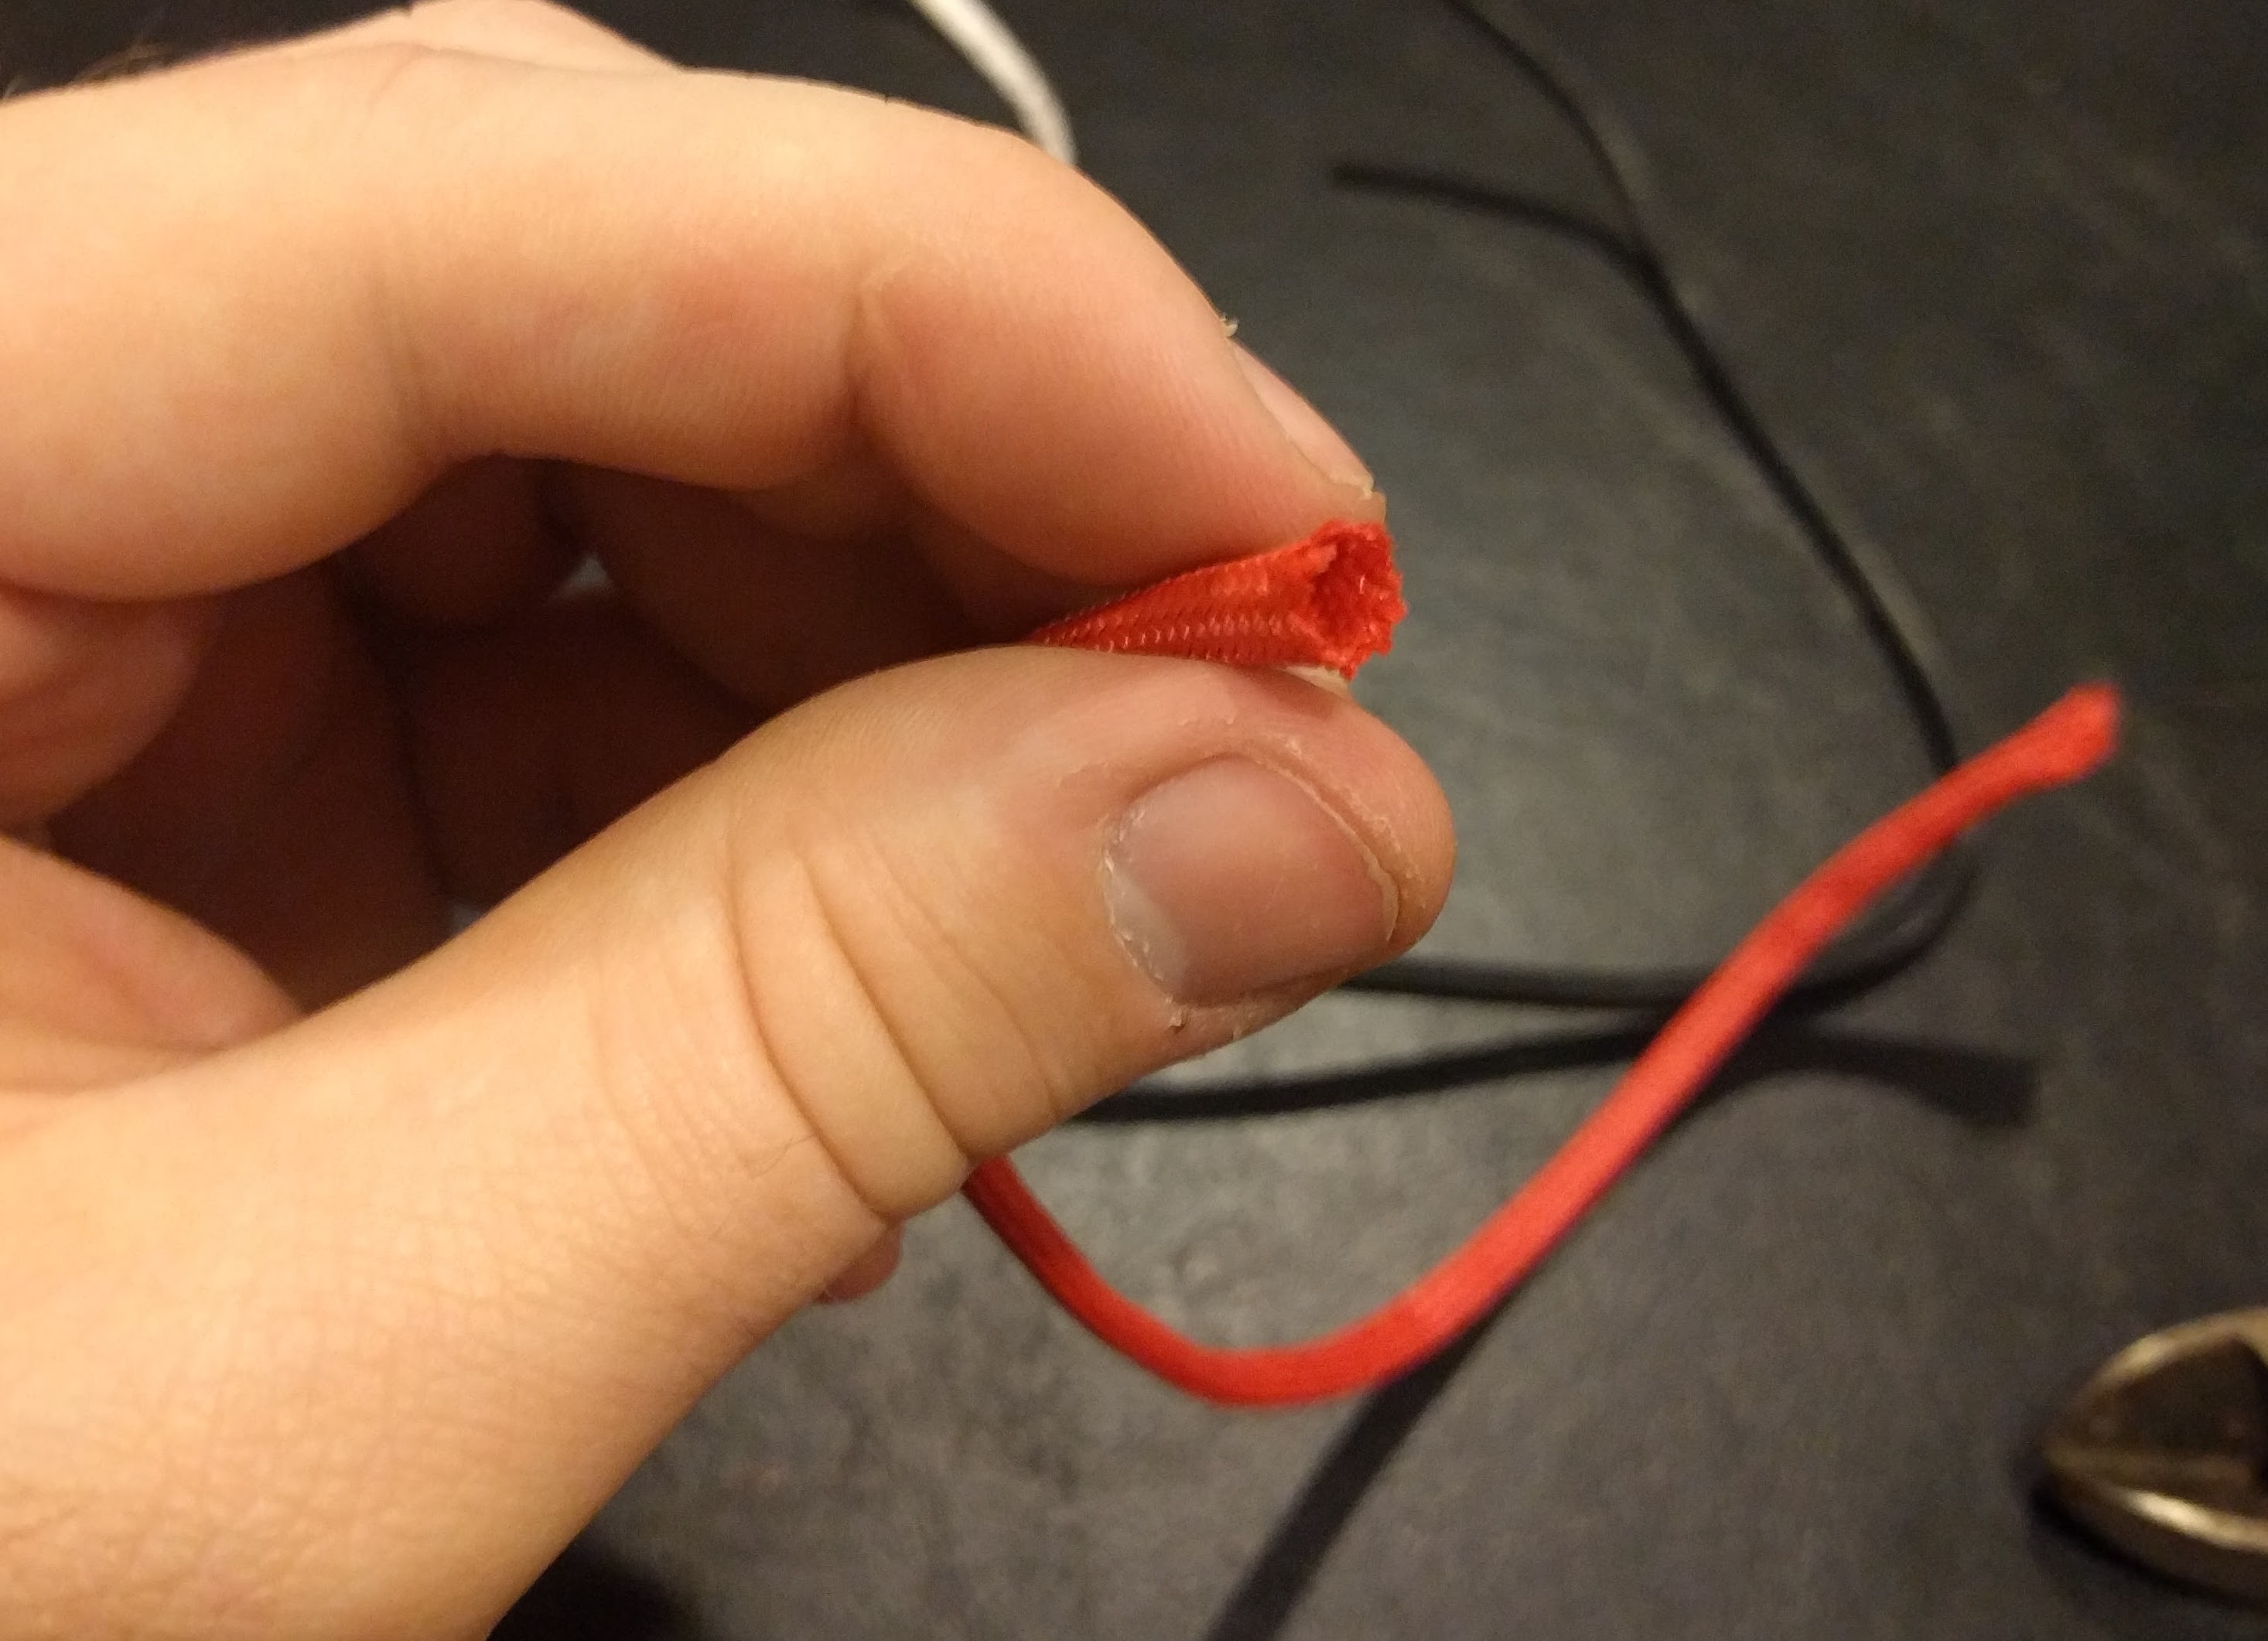
Once you have the sheathing seperated from the core strands, you can begin feeding your cable through. I found this to be pretty easy by using a sort of worm motion. Bunch it up on the leading end and then streach it out in the direction you’re moving it. That way you can kind of shimmy the cable through. Make sure to use a clean cut end of the cable as you bunch it through so that you don’t have wire getting caught on the sheath.
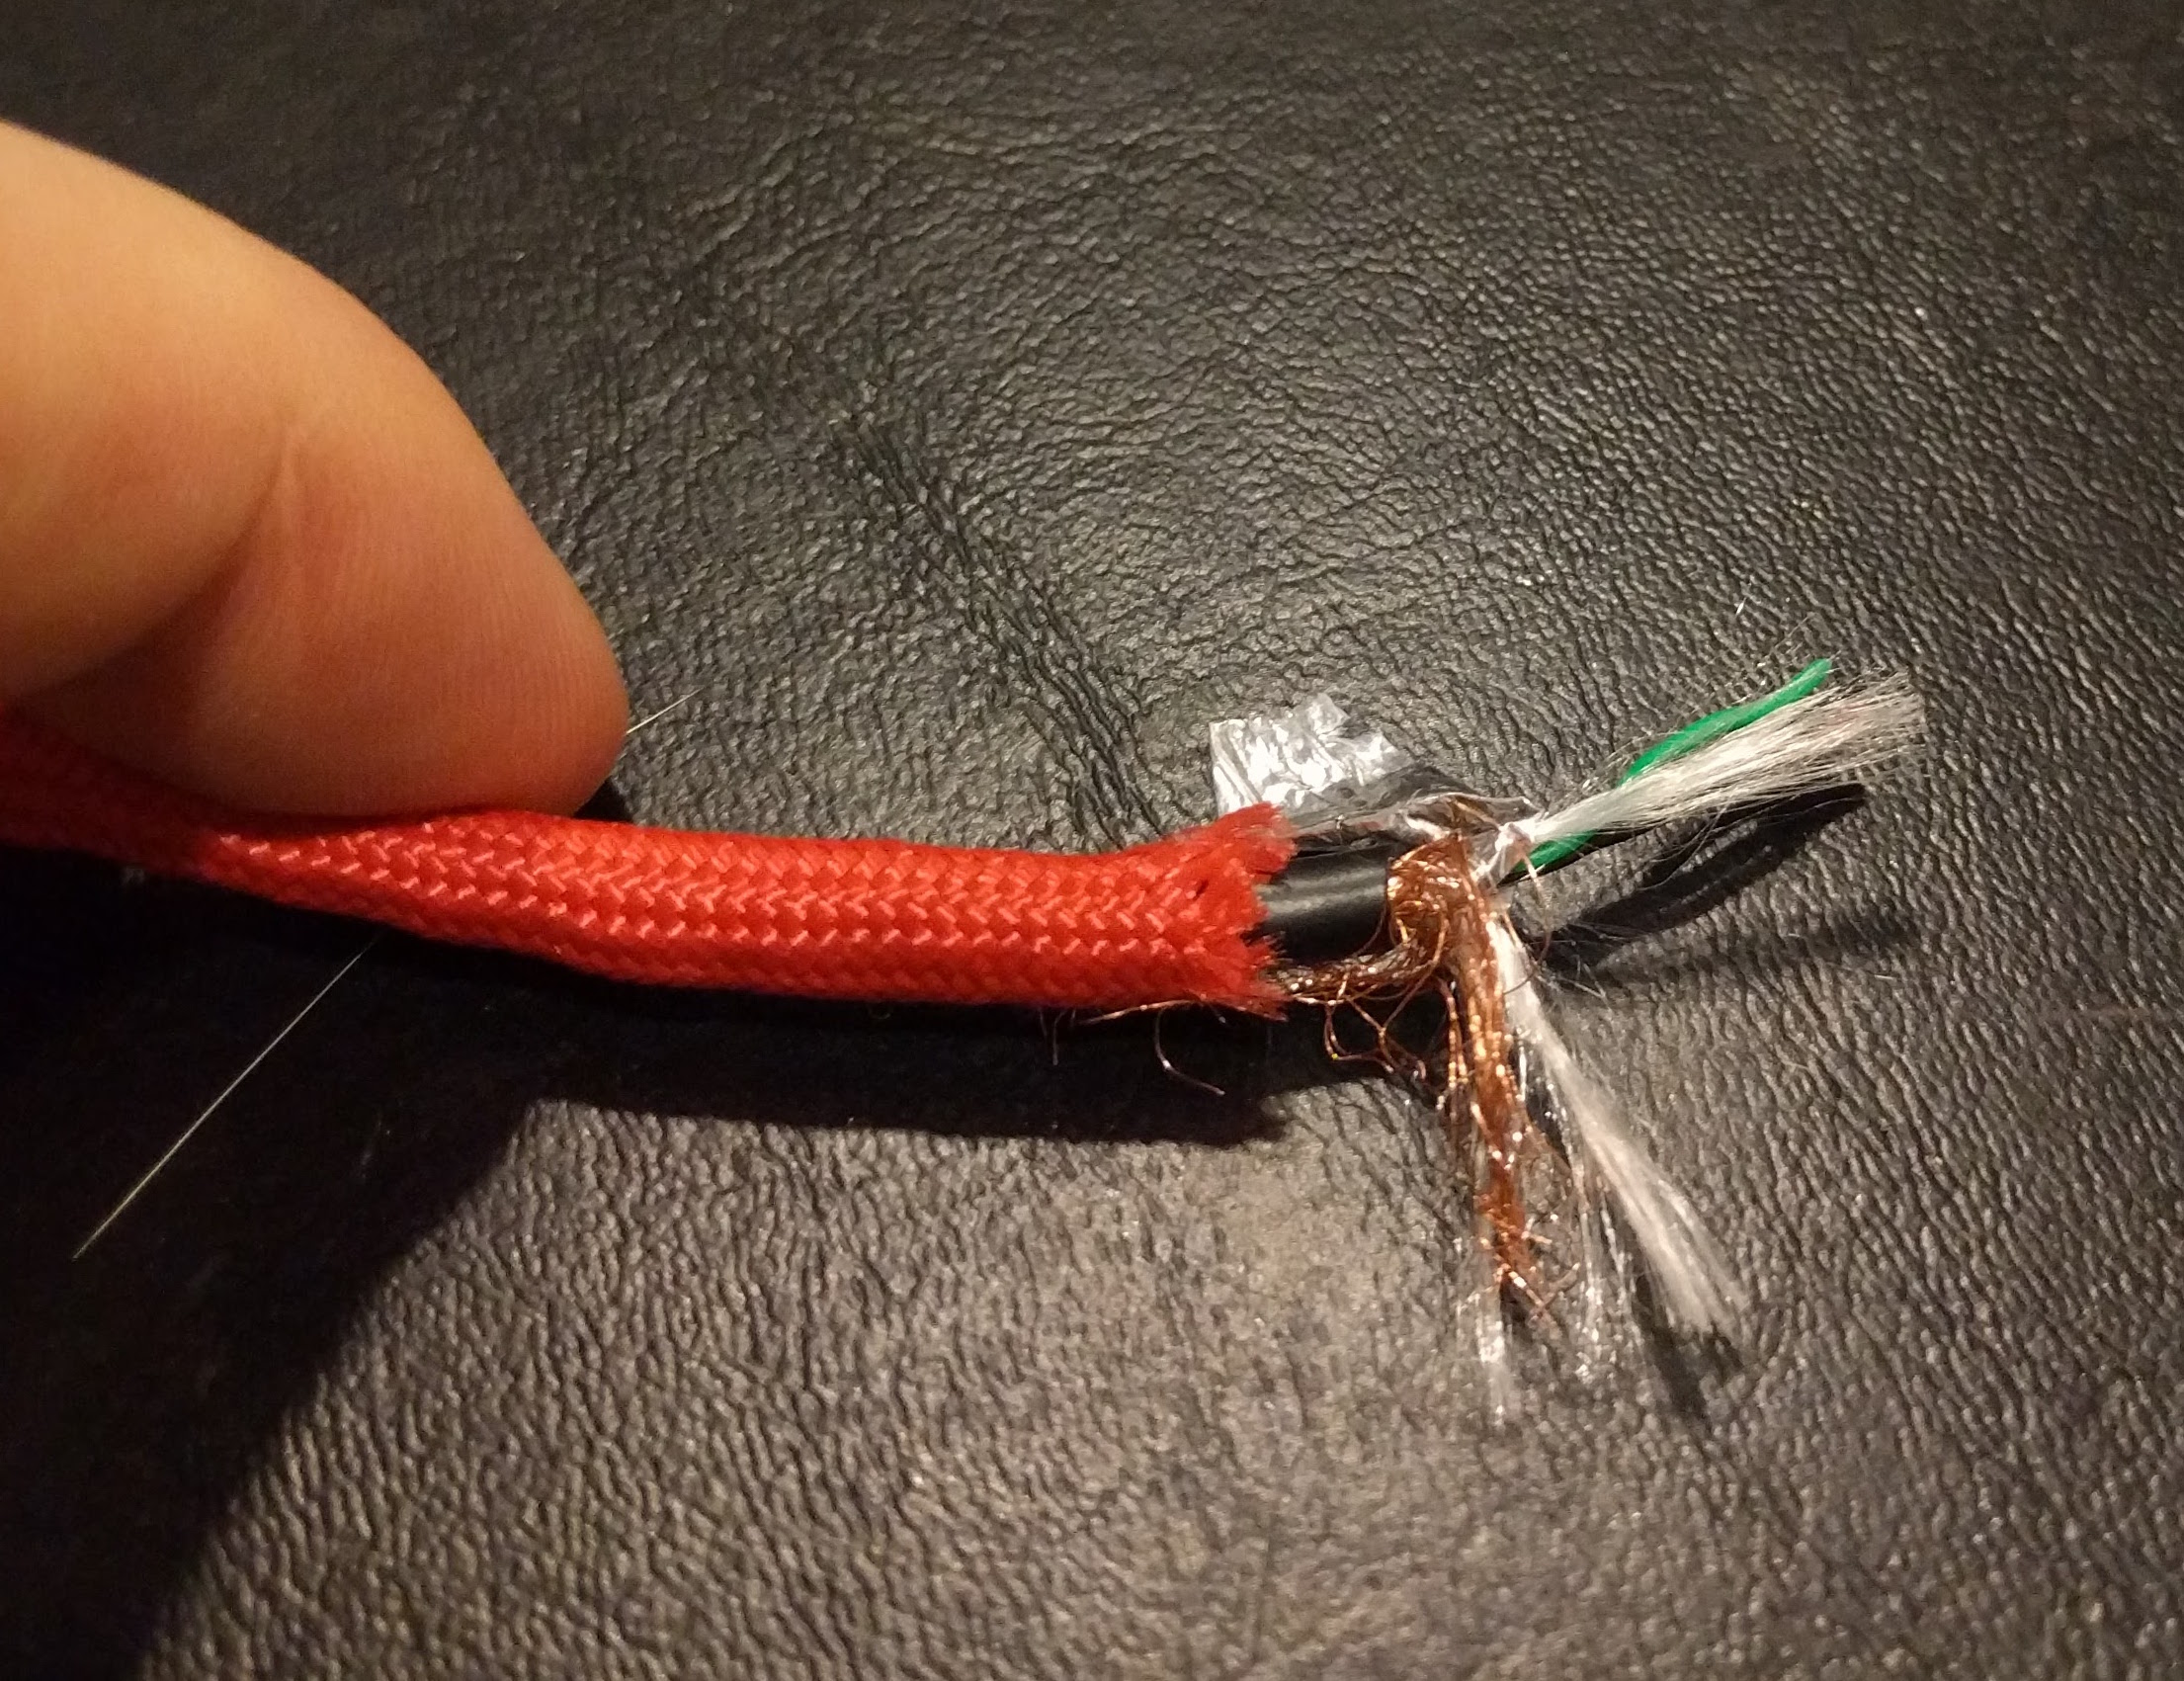
Once you’ve got the end through it’s time to strip down the cable and reveal the little wires inside. Those are the ones you’ll actually be soldering to the contacts on the TRRS cable.
After that, don’t forget to put the cable covers on BEFORE you start soldering on the wire contacts. For me it worked out better to streach out the nylon cover and feed that through the spring first before pulling it through the end. Then I did a sort of twisting motion to curl up the spring and make it bigger while sliding it over the end of the cable under the nylon cover. That worked out easier than trying to force it over. Don’t forget it’s connector cover, then spring, then plug. Once you’ve got everything in place it’s time to start soldering.
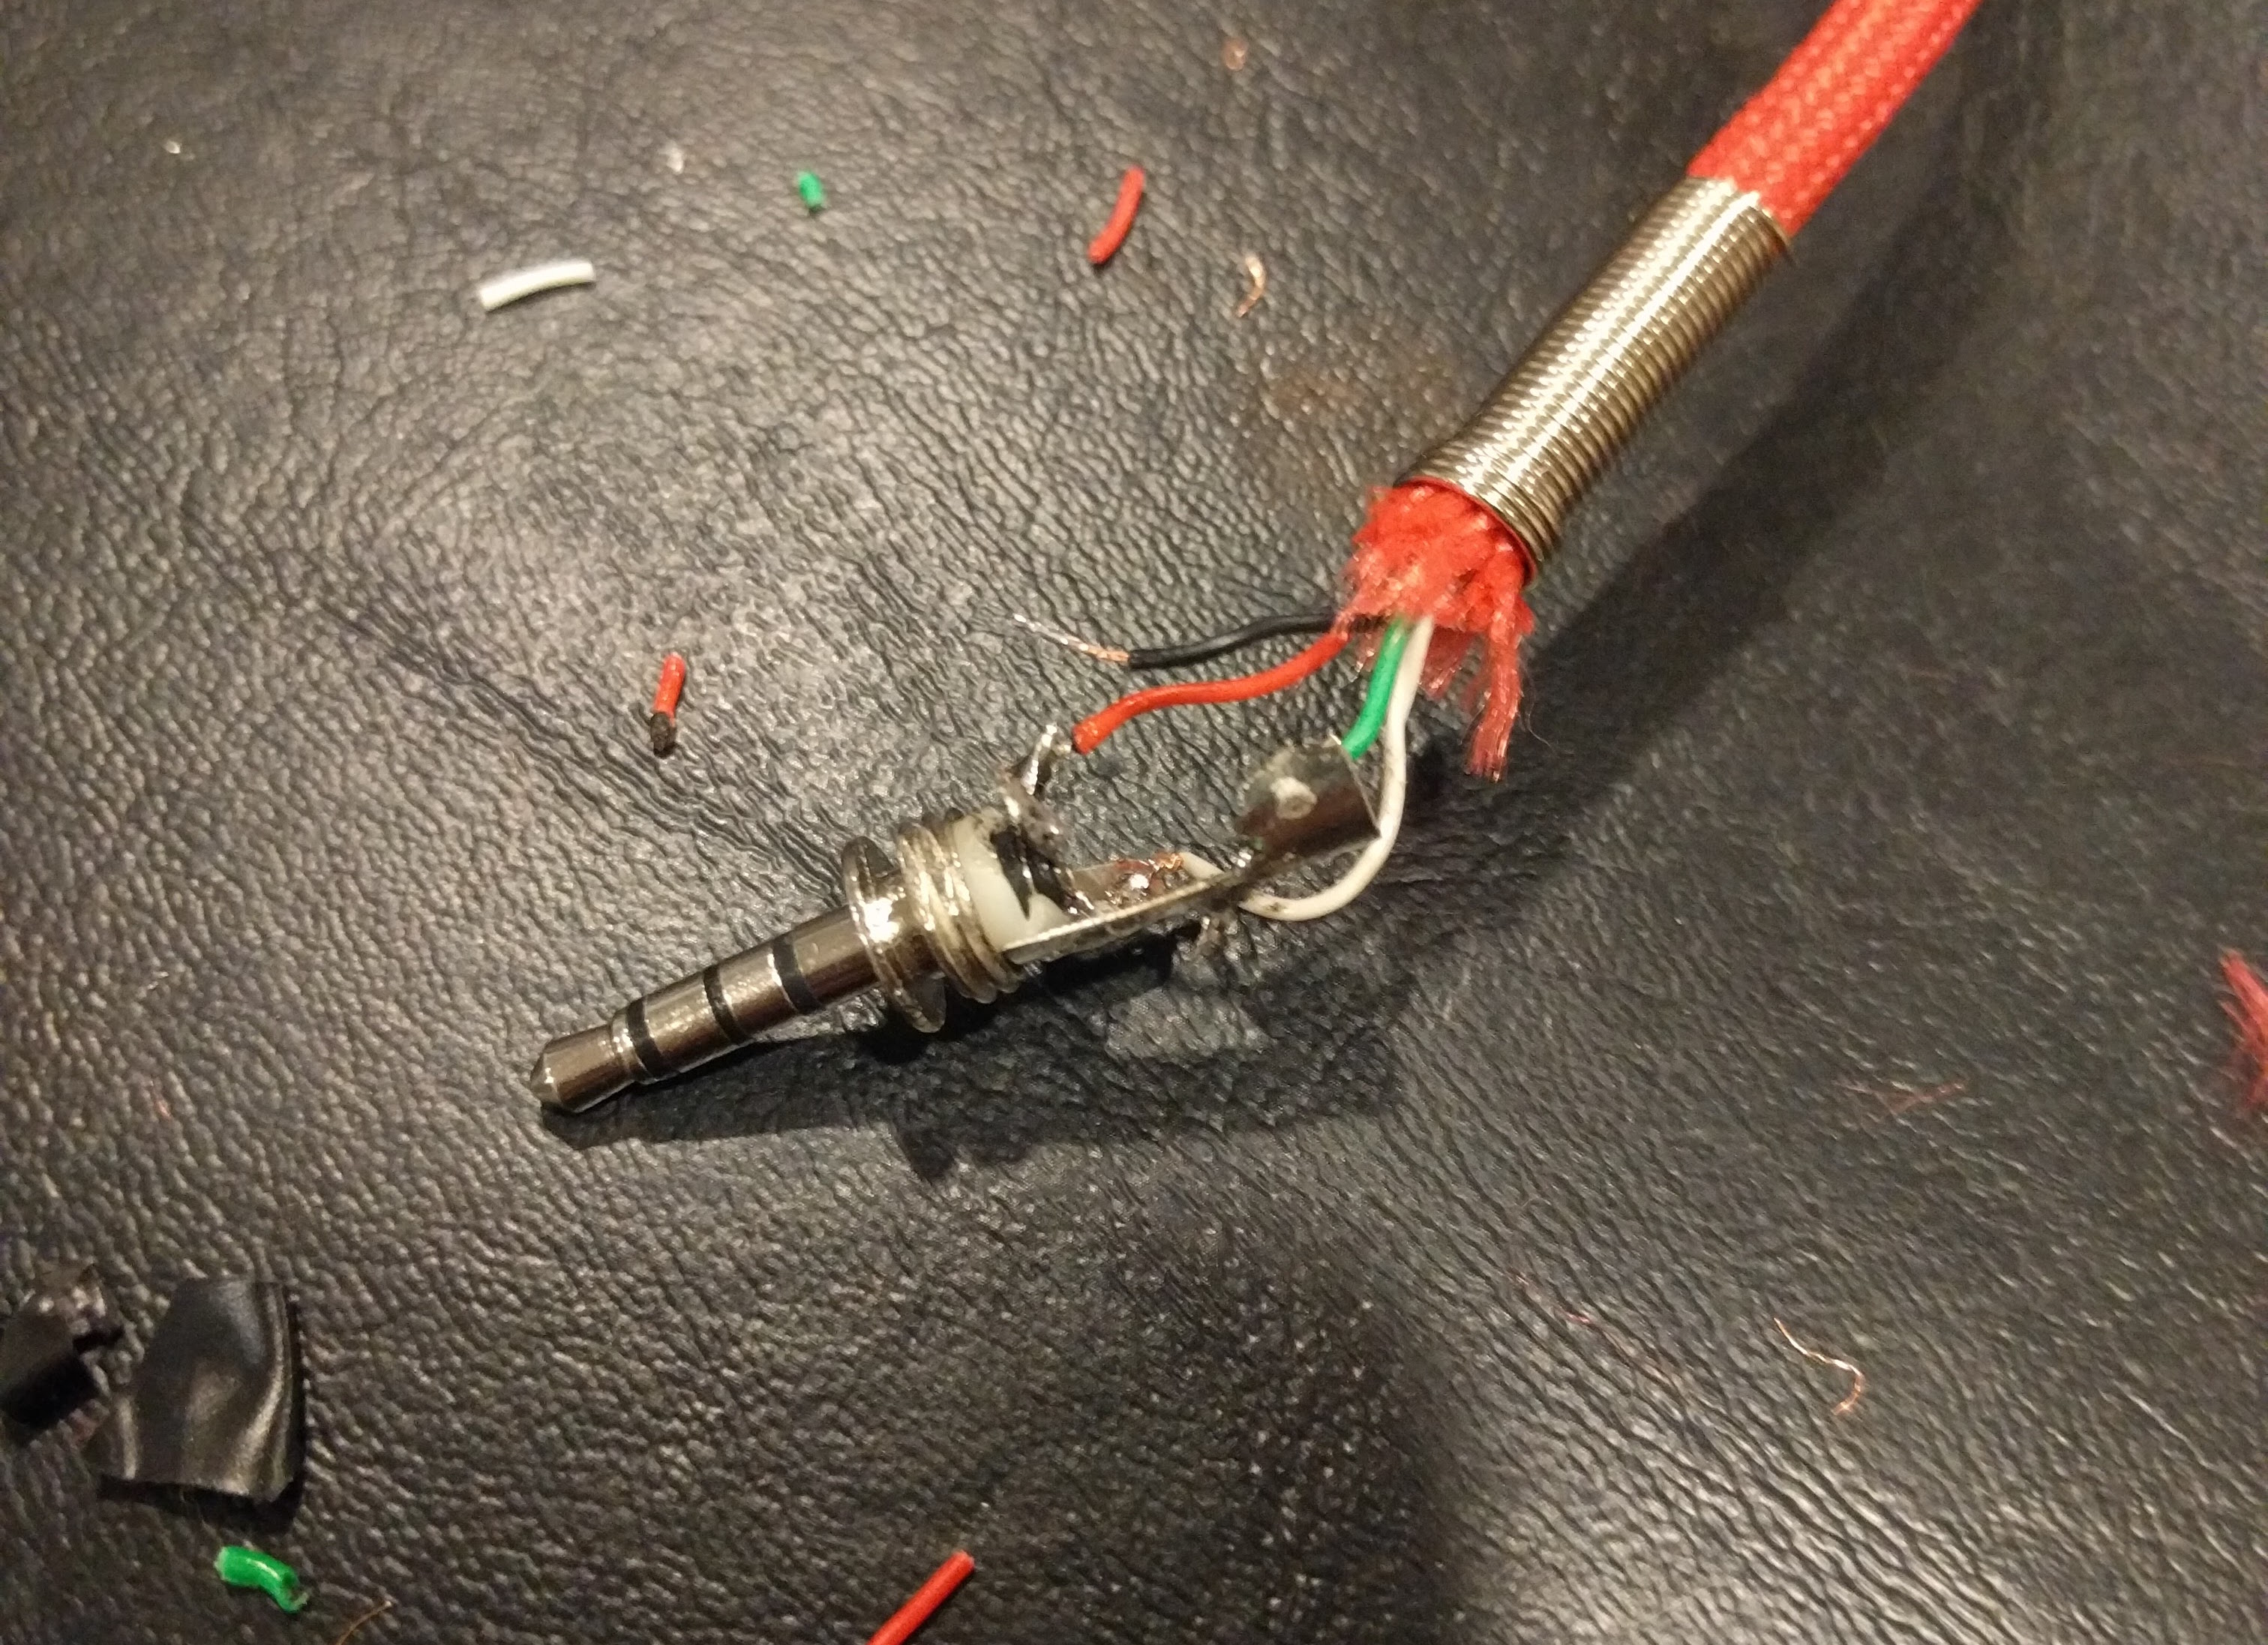
Make sure to keep a multi-meter out while you’re soldering to make sure that the connections are good, also make sure that the two ends match up exactly before you try plugging it in, or you might risk seriously screwing up your dox. I verified this both as I was soldeirng things and then two more times at the end just to make sure. I actually screwed it up the first time so that was sad. If I was going to do it again I’d solder one side and then before soldering the other I’d say okay, this pin here maps to this wire, and this connector maps to this pin and double check everything before soldering the second half.
Once the first end is done, use your multi-meter to test that each connection is good from the exposed wires on your unfinished end to the contacts on the TRRS on the other end. Then make sure you hook the wires up to the same contacts on the other end.
And that’s it! Once you’ve got both ends soldered up, once again make sure you’ve got all of the pins going to the right places. If you messed it up, no worries it’s not a big deal to pull some wires off and put them back on. Use some solder wick to clean up the contacts and then swap the wires around until it’s right. If you don’t you could really mess the left side of your dox.
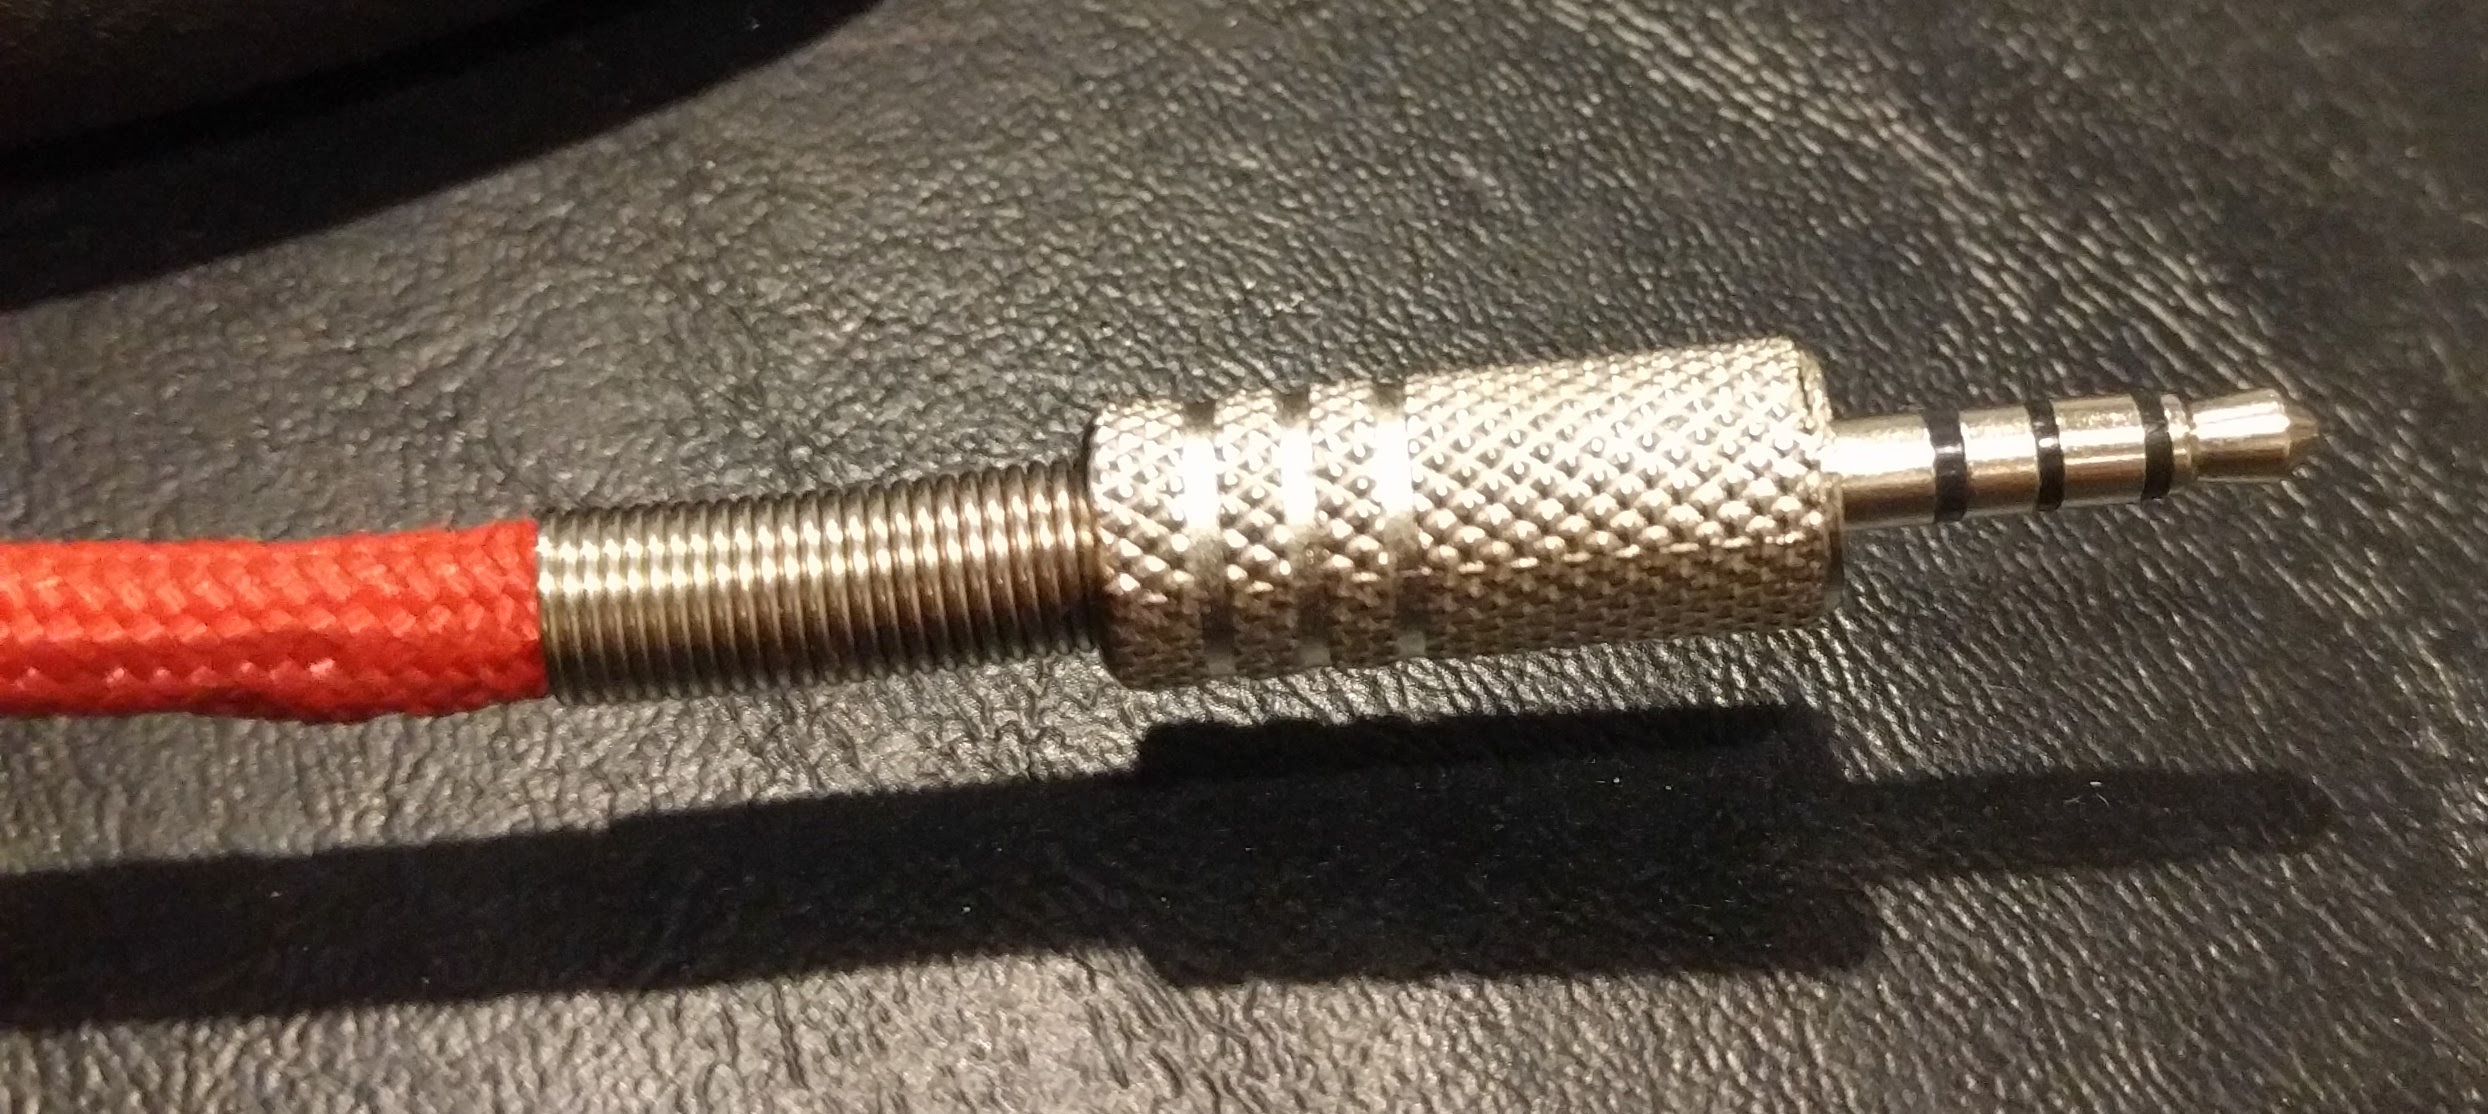
I think this cable looks much nicer than the old one. It’s got a classy feel to it since it’s got the metal ends and the cloth sheath. I’ve been thinking that maybe I want to try the same thing on the USB cable but I can’t seem to find fancy metal ends for that one.